This post was originally published in 2010
The tips and techniques explained may be outdated.
Follow this step by step design process of the making of a vector character. We’ll start with a hand drawn sketch of my dog, Jake the labrador retriever, then add various lines, colour fills gradients and highlights to produce a cute cartoon representation.
The sketch
When it comes to creating cartoon characters, one of the first things people say is, “But I can’t draw!”. I can certainly relate to their frustration too, as I consider myself far from being ‘good at drawing’. I often end up getting annoyed and screw up my sketchbook pages when attempting to draw things, but there’s a few little tips I’ve learnt from studying the basics of sketching from a young age. One major tip that seriously helped me out was from my childhood hero Tony Hart. In his book ‘Draw it Yourself’, he described how to combine basic shapes to build up the form of a character. Can you draw a triangle? What about a semi-circle? Excellent, you’re on for a winner!
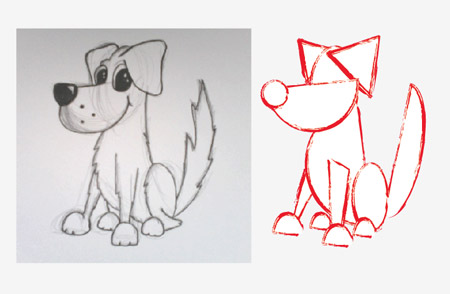
When sketching out the Jake the dog character, the whole head and body was fleshed out with just a few basic shapes. You can still see the faint sketch lines behind the black outline on the left. If you’ve had trouble drawing your own characters in the past, give this method a try.
Time lapse video
I originally planned to add a voiceover, but failed due to some technical difficulties. Instead, here’s a quick time lapse of the whole process in Illustrator
Step by step
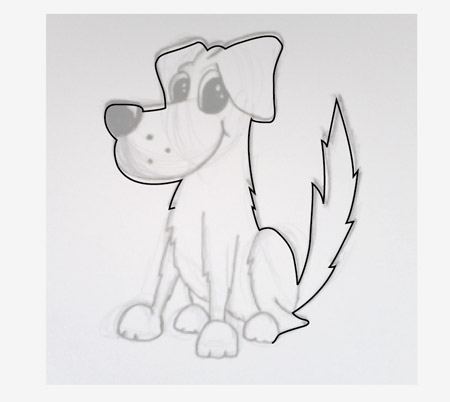
Open up Adobe Illustrator and import your scanned sketch. Go to File > Place to link your image file. Reduce the opacity slightly, then press CMD+2 to lock the object in place. Grab the Pen tool and begin tracing around the outline of the whole character.
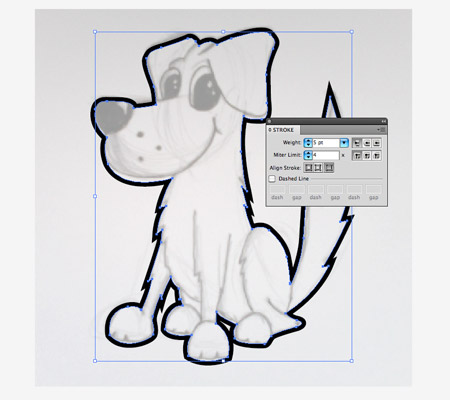
Once the outline is complete, increase the stroke weight to 5pt, and align it to the outside.
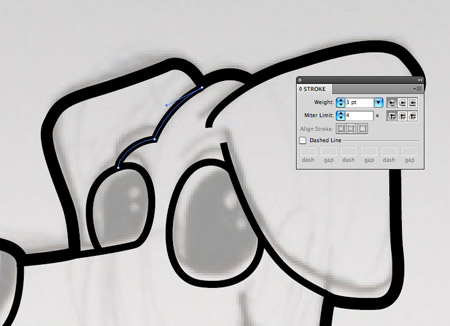
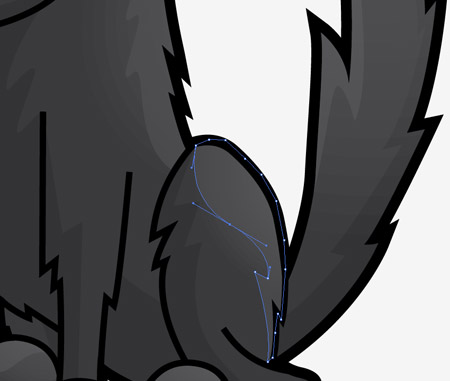
Continue working with the Pen tool, this time use a medium stroke at around 3pt to fill in the inner detail lines. These paths can be left open ended. Use the Direct Selection tool to go back and tweak the position of the end points so they flow seamlessly from the existing lines.
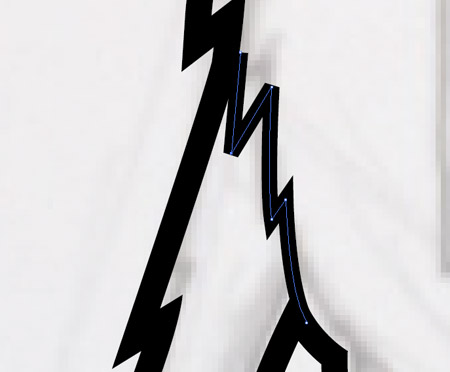
When drawing paths with spiky sections of fur, sometimes the spikes will be squared off. To fix this, just grab the Direct Selection tool and make some microscopic tweaks to the points.
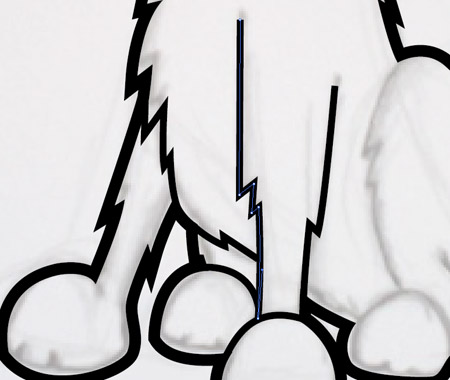
Use the inner detail lines to separate the body from the legs and the legs from the feet.
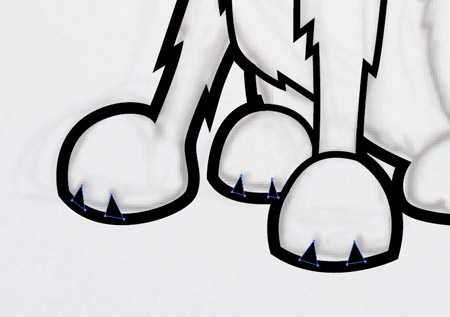
Solid shapes can be used on the feet to give definition to the paws. A black fill will merge seamlessly into the thick black outline.
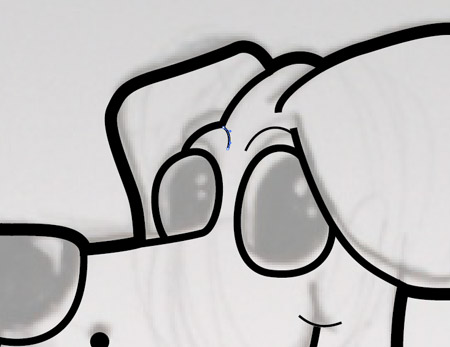
The next set of detail lines are even thinner, at a 1pt stroke. These lines can be used to fill in the finest details such as the eyebrow outlines.
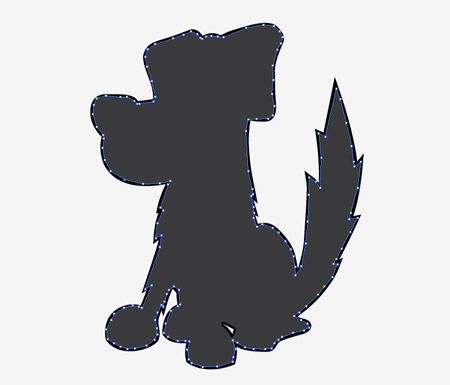
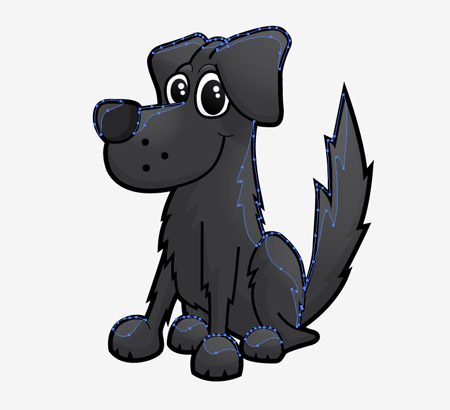
Now the linework is complete, we can start adding some colour. Start with a complete fill by roughly outlining the character. Keep the pathline within the confines of the thick black outline stroke. Use the shortcut CMD+Shift+[ to send the fill to the bottom of the stack, or set up layers to separate the linework and coloured fills.
When the coloured fill layer is placed underneath the linework, the rough outline is hidden by the black lines. Add extra colour fills to the character where necessary, the eyes in particular will need a white fill.

This would be a good opportunity to bring the eyes to life. Draw a large black oval, then add a couple of specular highlights to each eye.
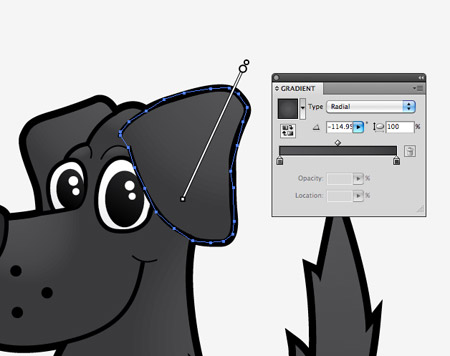
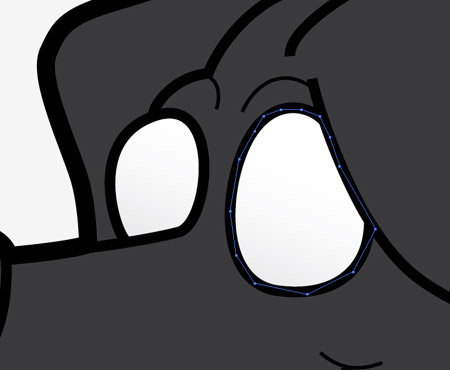
Add a little depth to the character with some subtle gradients. Trace new shapes over specific areas that require highlighting, then adjust radial gradients to flow from a slightly lighter tone to the solid fill colour.

The imaginary light source for my character is in the top right, so gradient highlights are added to the top and right hand areas of the character head and body.
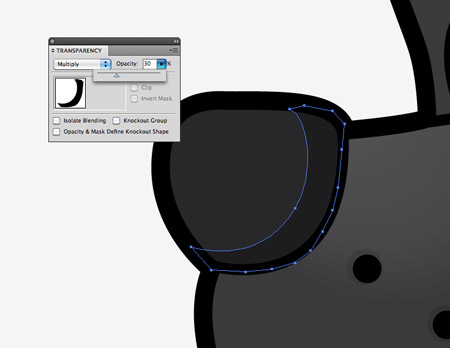
Next we’ll add some shading to the character using the Pen tool to draw black shapes. Roughly trace the outline within the black outline, then smoothly cross the body of the character following the imaginary contour lines. Adjust the Transparency of these shapes to Multiply at 20%.
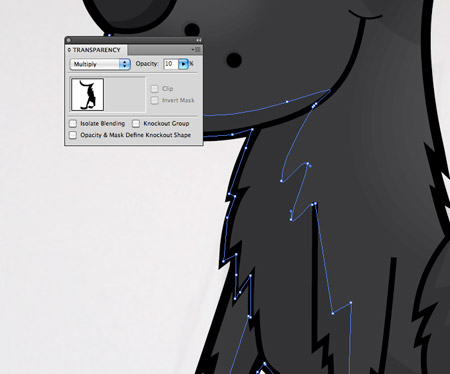
Continue drawing shadows across the bottom left of the character. Areas that cut across the body can are given some curvy lines to both add visual interest and to subtly represent the layers of fur. Shading over the body is reduced to 10% opacity to avoid being too harsh and contrasting.
Shading is added to the underside of the body, each paw, the lower edge of the tail and below the large flappy ears.

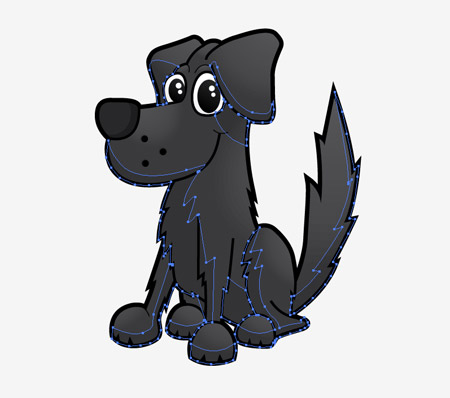
A few extra highlights help add more variation in tone to give more depth and dimension. Flowing shapes are drawn across the character but this time they’re filled with white and a transparency of Screen at 5%.
The shapes of the highlights can help define the contours of the body, or can be made to follow the shapes of the black outline.
Shadows were added to the bottom left of the character, so highlights will appear on the top right of each of the character’s body parts.

Draw a circle and fill it with a black to white radial gradient. Change the opacity of the white stop to zero so the gradient fades to transparent.
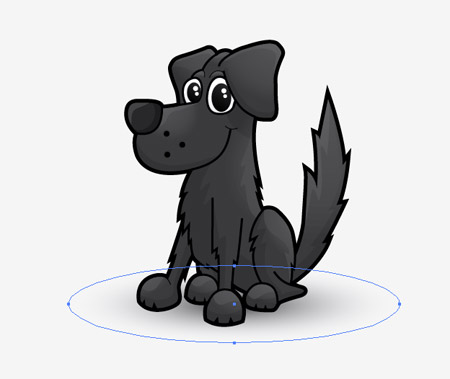
Squash the circle and move it into position as a shadow underneath the character.
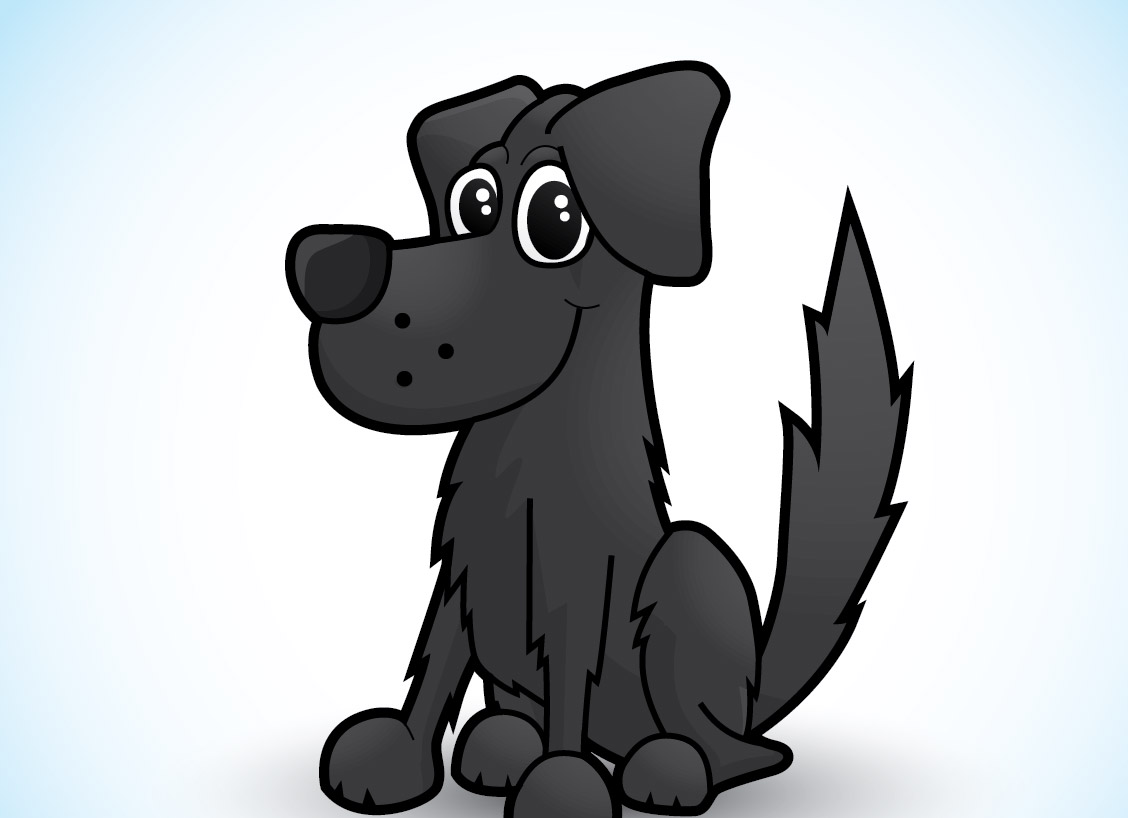
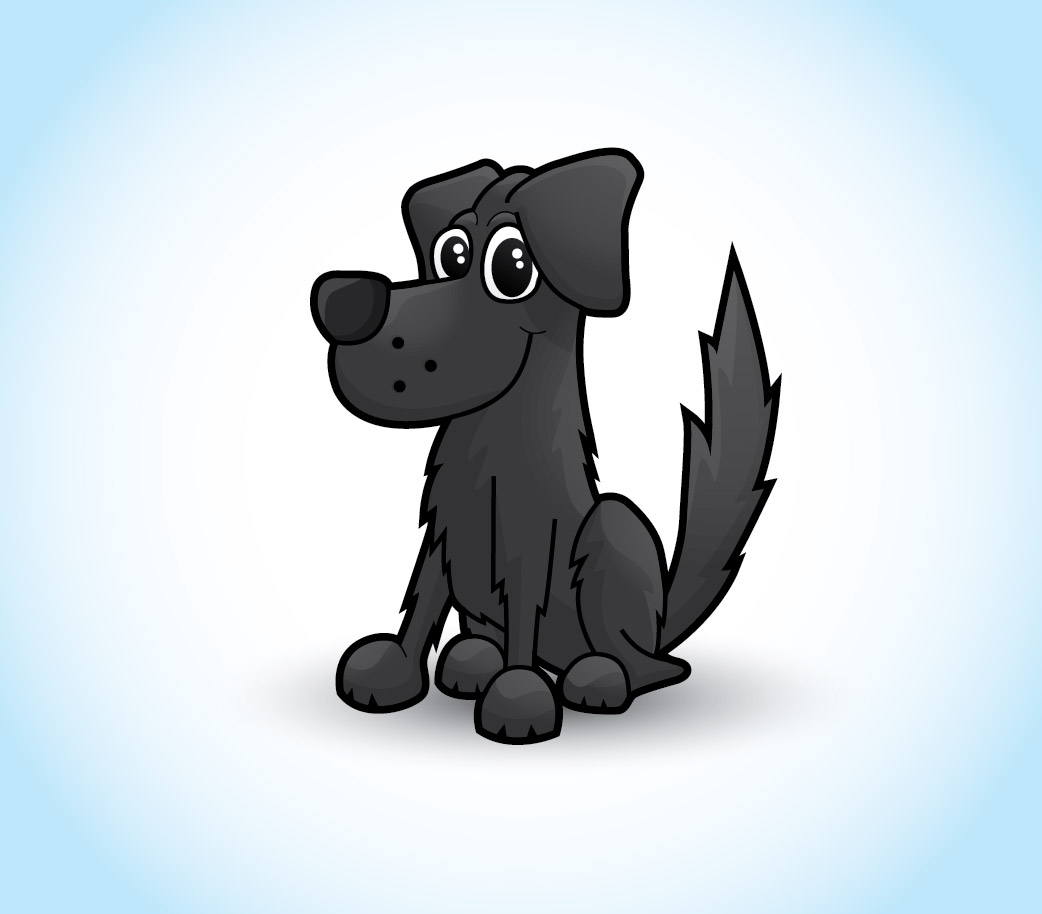
The final character is a total transformation from the rough sketch. The varied linework and subtle shadows and highlights all help add depth and definition. Check out the character and the real life Jake on his very own website over at http://jakethelab.com.

Lovely outcome! How long does it took to sketch and create it in Illustrator?
A really nice tutorial Chris thanks! Love the website as well!
You will not believe but this is what I was looking for! Thank you very much for great tutorial.
you must love jake so much ;)
this is a nice tuts bytheway (as always)
This is such a helpful tutorial and the dog is so cute…
Wow!! This is a great tutorial with a beautiful end result. Thanks Chris!
love this tutorial. I will try
Great work Chris, really impressed with the final outcome. I bet Jake loves it! ;)
He’s so cute! Great tutorial, thanks Chris!
im going to make a bear… a hungry one.
Jake is cool! He does deserve his own website. Looking forward to some barking tutorials :).
Jake is becoming a pretty famous dog! Great tutorial, great outcome.
Awesome time lapse video chris… Quite the Pen Tool pro aren’t you..
I agree with everyone, awesome tutorial, I have always had a love for vector cartoons. Also, you sure are great with the pen tool!
Nice 1 Chris…Keep these tuts coming !!
Great Tutorial, Chris! Thanks!
My problem is always the shading! I never know where I have to put shades and highlights. Do you have any tips on how to learn that?
Great Tutorial Chris. I love these types of tutorials :)
Thanks for sharing the information.It is definitely going to help me some time
Really cool tuts, I like this one.
By the way, since now, your blog is listed on my blogroll Chris, thanks for new and fresh tutorials :)
this was a really quality post.I wasn’t aware of the many ripples and depth to this story until I surfed here through Google! Great job.
Awesome tutorial =D
Thanks
Nice tutorial.
Like Nicole, I too have problem on the shading part. We’ll be waiting for some tips if their will be.
Thanks!
Great tut Chris. Your attention to detail really sets your stuff apart. I’ll be giving this a go tonight I think. Cheers!
Thanks it was helpful.
Very cute. Thanks for the easy to follow tutorial.
Wonderful tutorial. Very detailed and easy to follow. Thank you! :)
cute
This dog reminds me of my dog Paul :( it was so happy and playful !
I always enjoy the process, but I don´t like too much the final illustration. I prefer the quality of the panda :)
very cool. i have to learn almost everything :-P but your blog is a very big help.
love it!