This post was originally published in 2013
The tips and techniques explained may be outdated.
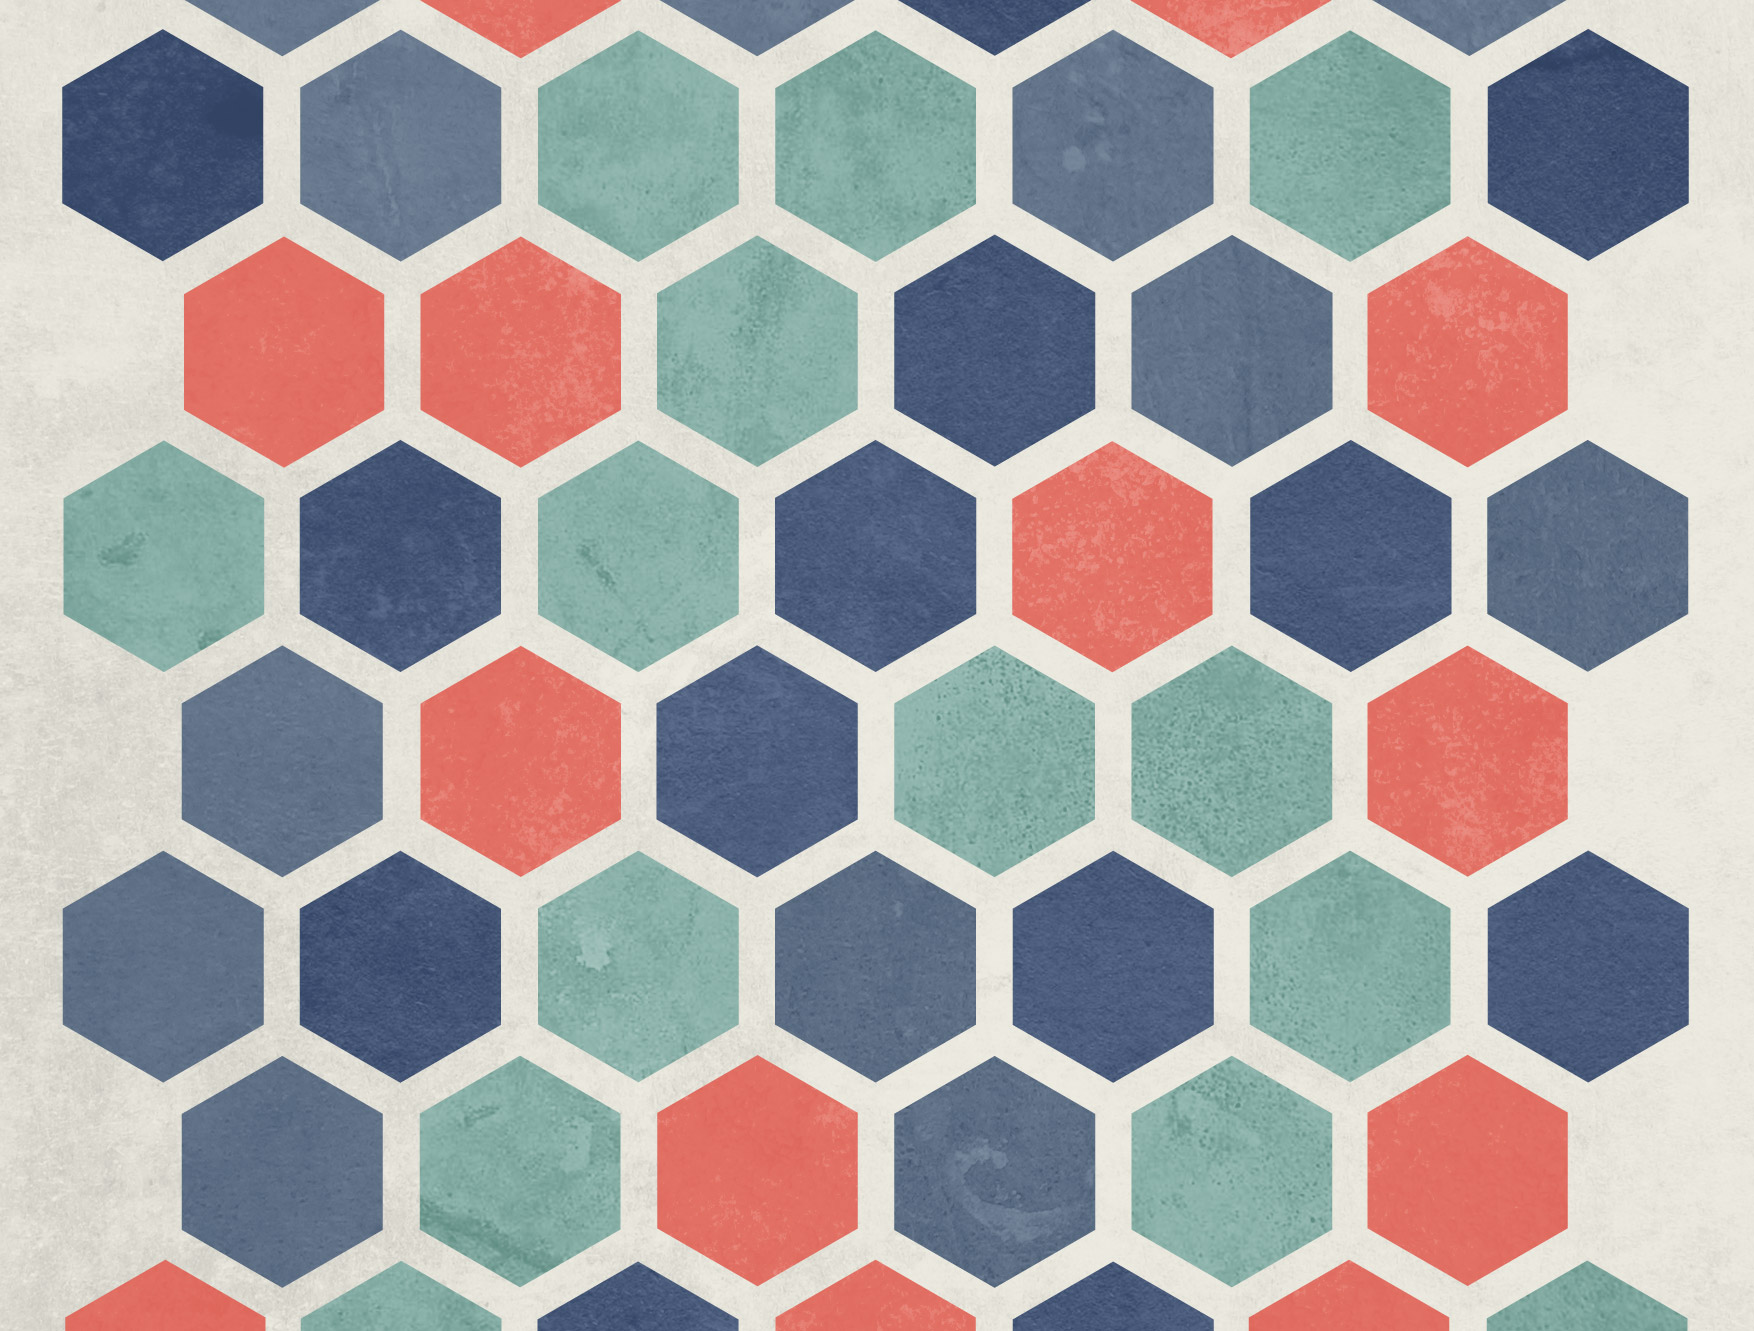
Some of the coolest designs can be created with the simplest of tools. In this tutorial we’ll create a cool abstract poster design using nothing more than a hexagon. With careful composition, an enticing colour scheme and a series of textures you can easily create a great looking design that would work perfectly as a poster, or even artwork for a book or album cover.

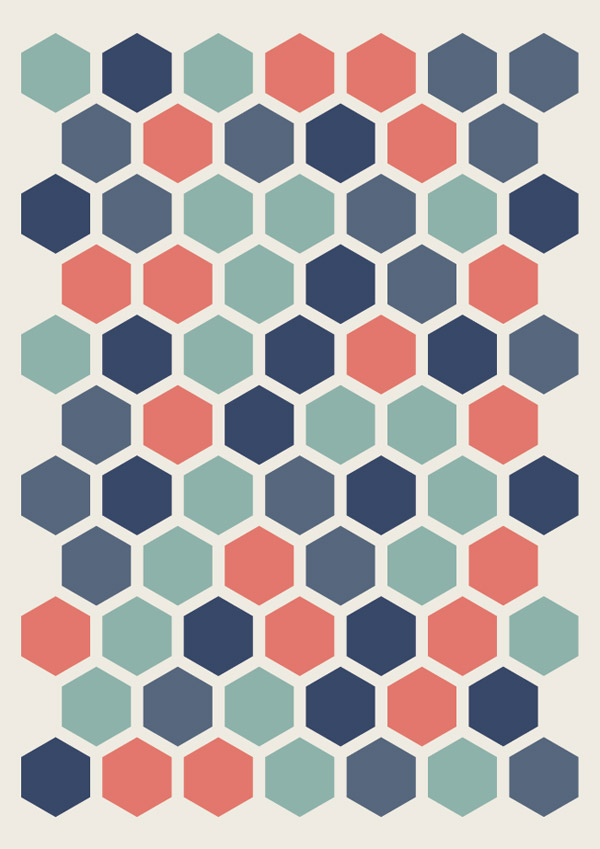
The design we’ll be creating is made up of a series of repeating hexagon shapes. The random injection of colour brings the design to life while the addition of textures helps create an aged retro style similar to the kinds of geometric patterns that were trendy in the 70’s.
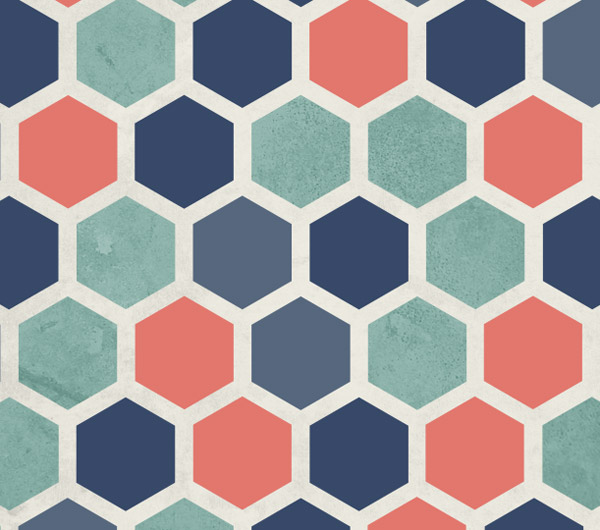
View the final abstract geometric poster design
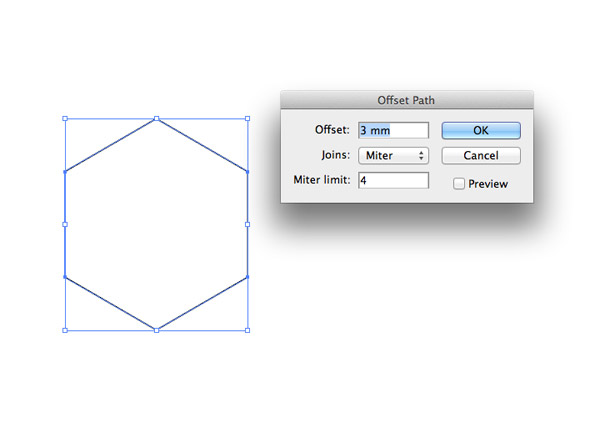
We’ll use a mix of Illustrator and Photoshop to create the artwork. Illustrator is naturally a good choice when working with shapes, so begin by drawing a 6 sided polygon on the artboard. Rotate the shape by 90 degress then go to Object > Path > Offset Path and enter 3mm.
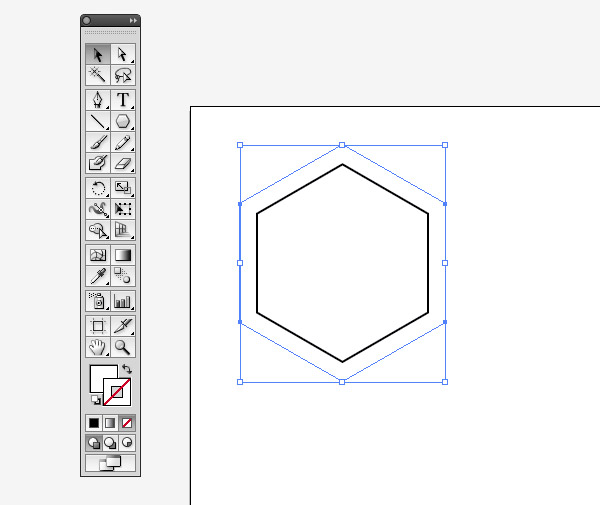
Select the new offset shape and clear out the fill and stroke. Individually click the fill and stroke boxes followed by the small icon with a diagonal red line.
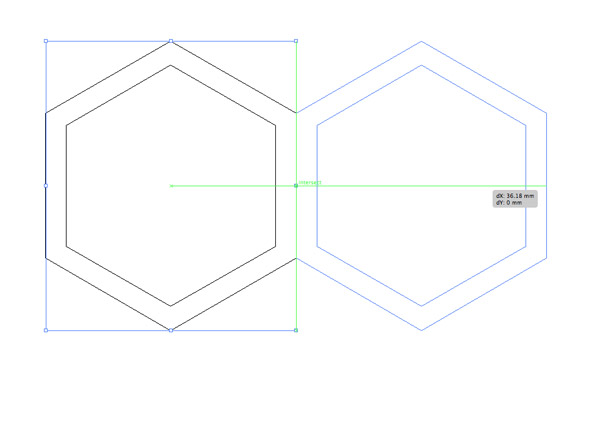
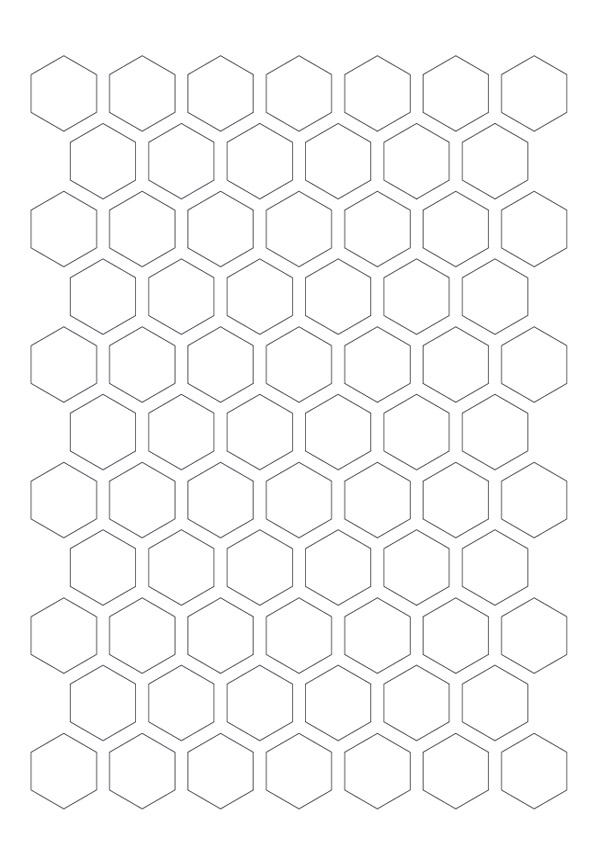
Press CMD+Y to turn on Outline mode, then hit CMD+U to turn on Smart Guides. Hold ALT, then click and drag a duplicate of the polygon shapes horizontally until they align with the originals.

Hit CMD+D numerous times to repeat the transformation until you have a long line of hexagon shapes.
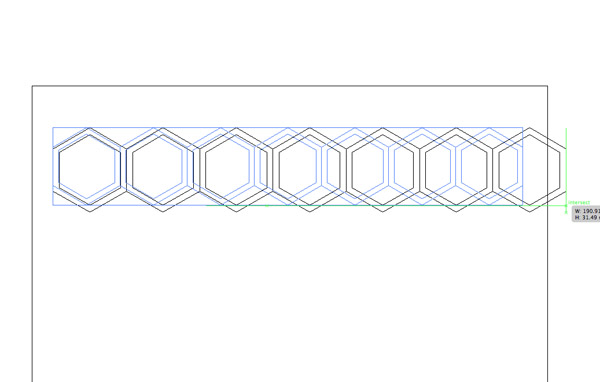
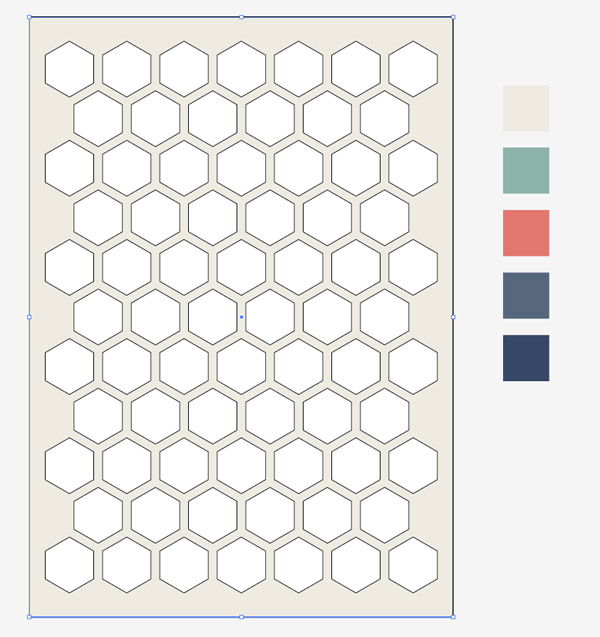
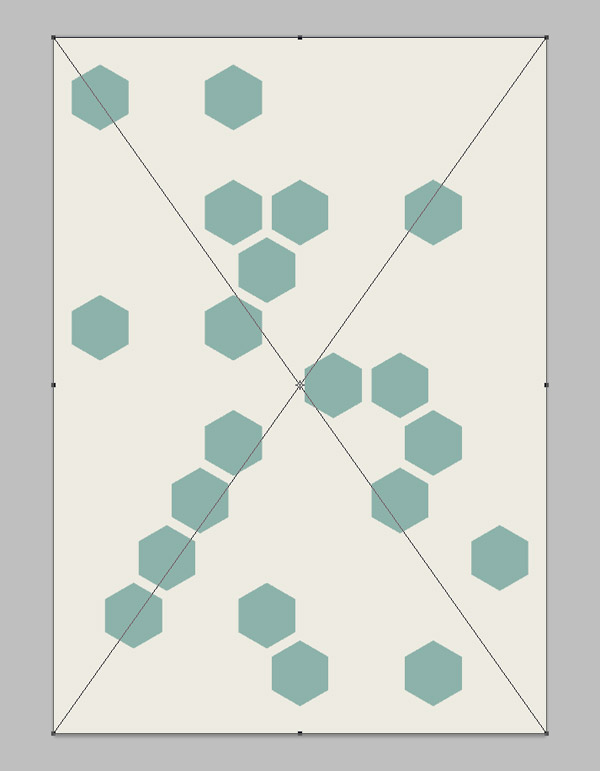
Draw a selection around the line of shapes and scale them down to fit onto the artboard. Don’t forget to hold Shift to retain the proportions.
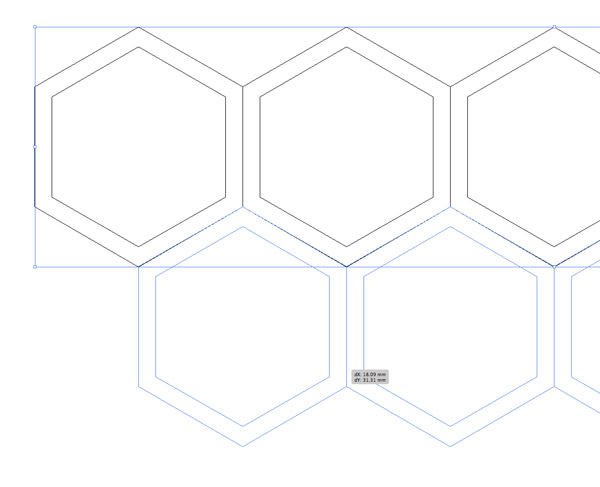
Zoom in and click and drag the complete line vertically downwards while holding the ALT key to create another duplicate. This time align the outline between the bottom edges of the originals.
Click and drag another duplicate of the first row, this time move it straight down to add a new row to the pattern.
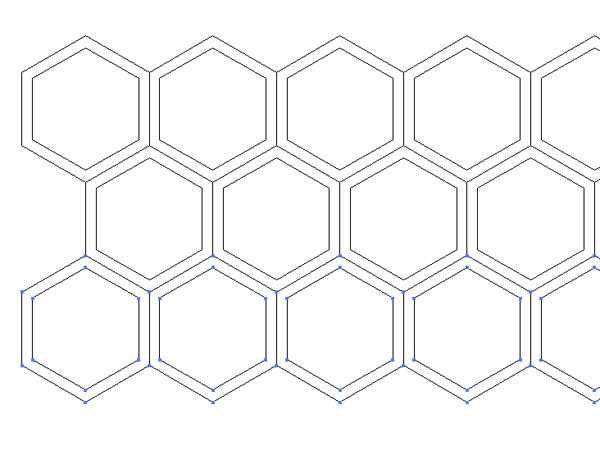
Repeatedly press CMD+D to repeat this transformation. Don’t worry about the gaps in the design, we’ll fill those in just a second.
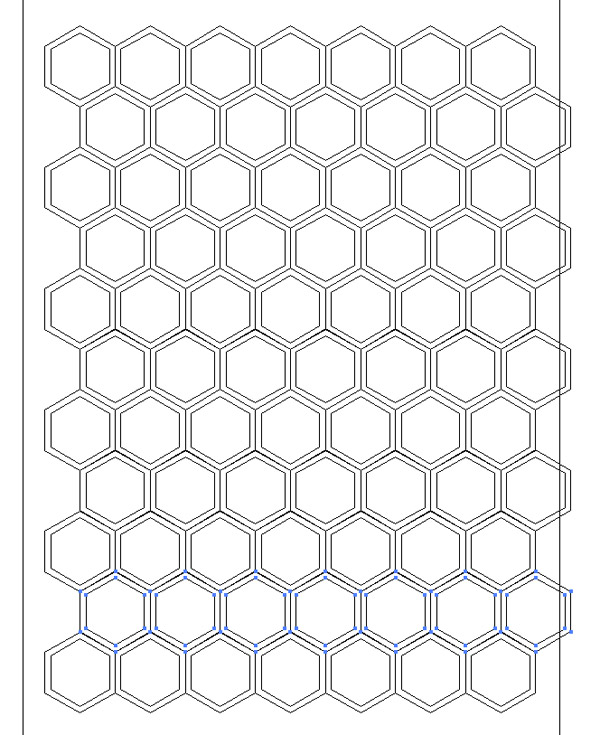
Select the second row of shapes and drag a duplicate to fill the next gap. Repeatedly press the CMD+D shortcut to repeat this transformation until the pattern is completely filled.
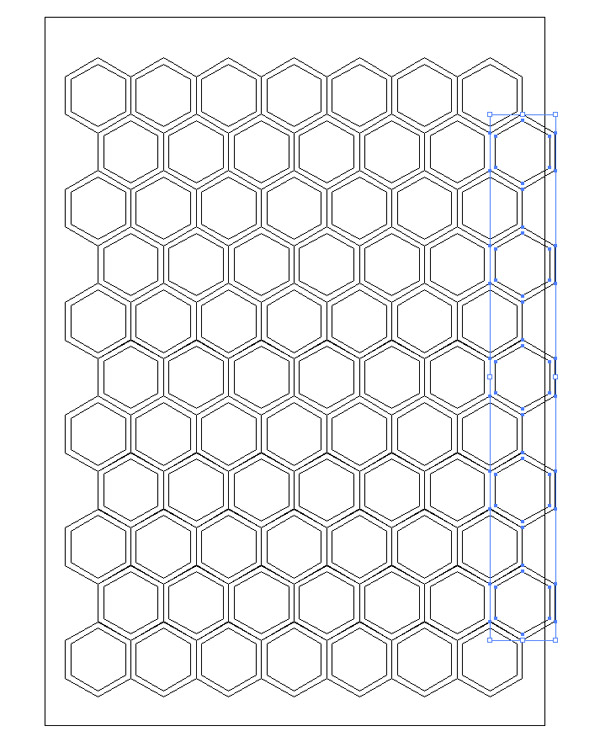
To make the pattern symmetrical, select and delete every alternate hexagon that sticks out too far on the right.
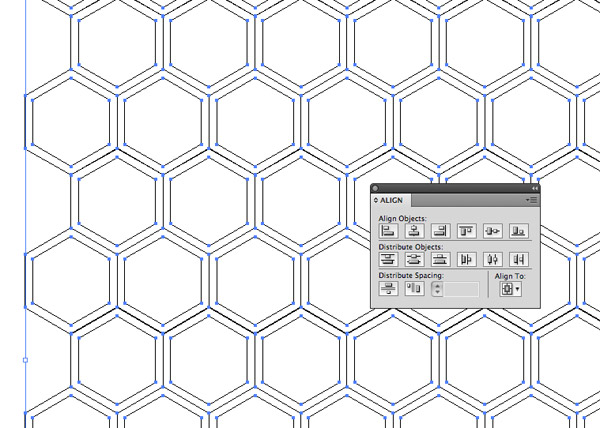
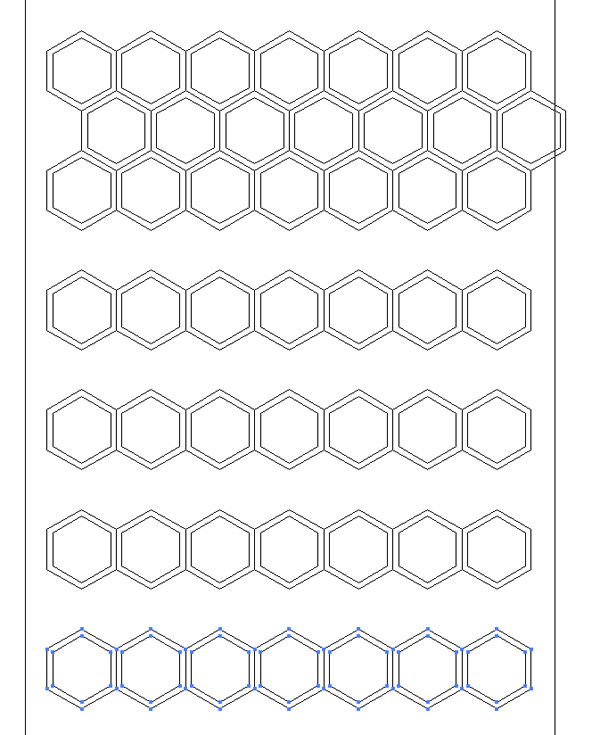
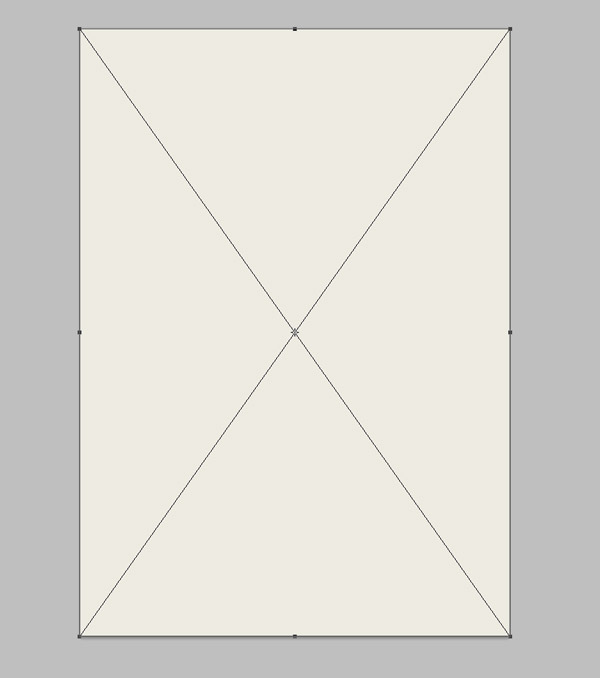
Draw a selection around the whole pattern and press CMD+G to create a new Group. Align the design centrally on the artboard using the Align palette. Right click and Ungroup the shapes once done.
Press CMD+Y to turn off Outline mode. The offset shapes are still present, but because they don’t have a fill or stroke they aren’t visible.
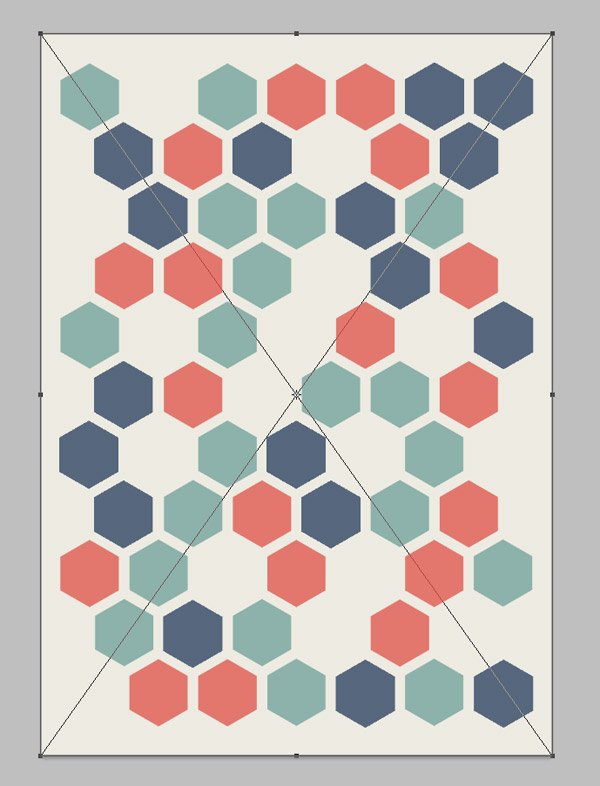
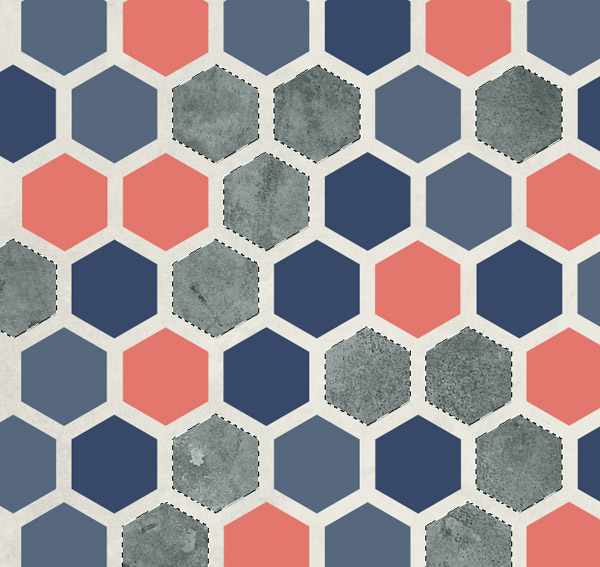
Fill a few squares with colours from a nice palette. I actually found this cool image from Designspiration that I colour picked my swatches from. Use one of the colours to draw a large background rectangle across the artboard. Press CMD+Shift+[ to send this shape to the bottom of the stack.
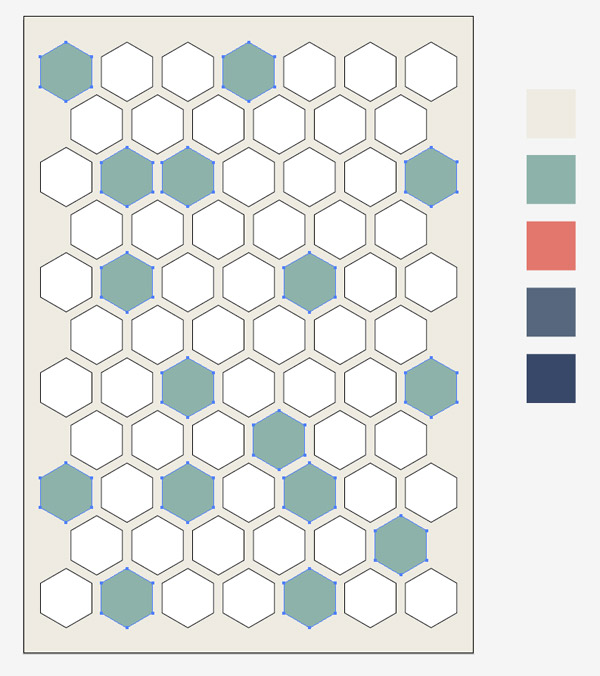
Hold the Shift key and randomly select a series of hexagons from the design. Use the colour picker to click on the first colour from your chosen palette.

Repeat the process, this time choosing the second colour from the palette. If you random selections end up creating an unwanted group of the same colour, simply replace the fill of odd shapes here and there.
Alternate through the swatches in your palette until the whole pattern is filled with colour. This design looks pretty cool so far but some texture overlays will really bring it to life. For this we move over to Photoshop.
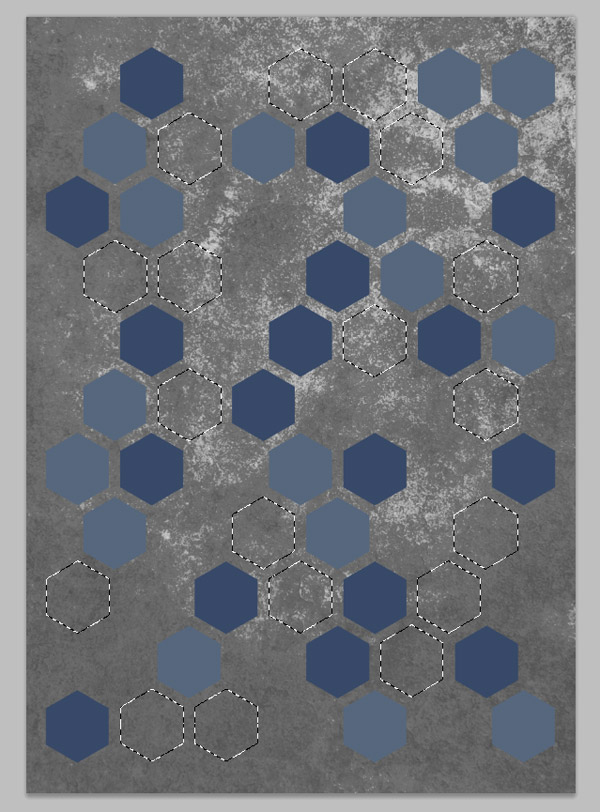
We could just paste the whole design into Photoshop and apply one large texture, but you can achieve some cool effects by adding different textures to each individual portion of the pattern. Begin by pasting in the background shape to fill the Photoshop background with the same colour.
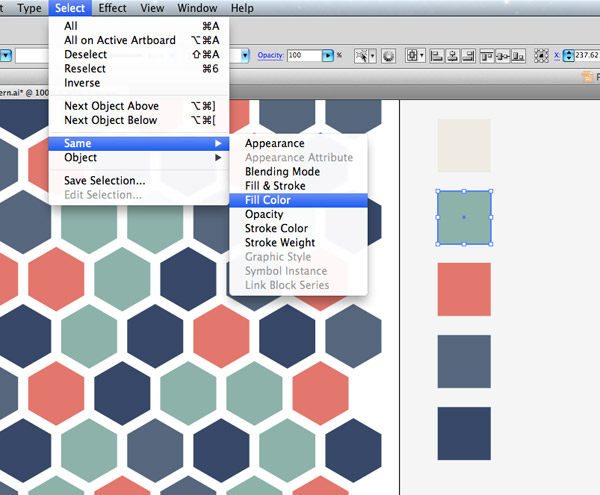
Remove the fill from the background shape, then select the first colour swatch from your palette and go to Select > Same > Fill Color. Hold Shift and minus the swatch from the selection, then add the large rectangular outline to the selection.
Copy and paste this selection into Photoshop, creating a separate layer for all the green shapes.
Repeat the process with all the different coloured elements. Copying in the empty rectangle keeps the selections the same size so they all line up perfectly in the Photoshop document.
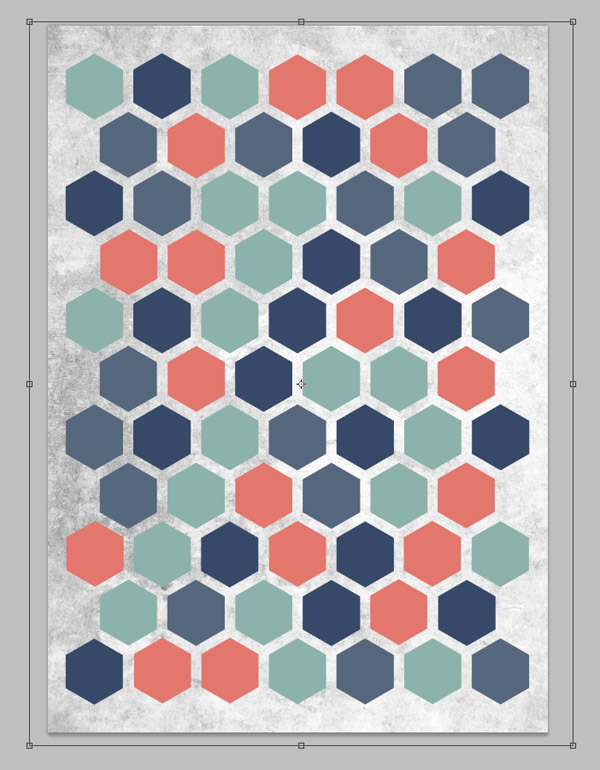
Browse LostandTaken.com from some cool textures and paste one just above the background fill colour layer. Desaturate the texture then change the blending mode to Multiply with 30% opacity.
Paste another texture over the green shapes layer and desaturate it. CMD+Click on the layer thumbnail of the green shapes layer to load its selection, then apply this selection as a Layer Mask to the texture layer to trim it to size.
Change this texture layer to Soft Light at 70% to create a series of unique distressed marks. Applying one texture to the whole image would have resulted in continuous marks. It’s the kind of detail that goes unnoticed but really adds to the design.
Repeat the process with another texture for the next series of shapes. Load the selection and apply it as a Layer Mask.
The texture overlays remove the clean and flat appearance of a digital design and gives the artwork a more realistic and tactile appearance. Those muted colours and the distressed textures also helps relate the design to those cool retro geometric patterns from generations past.

thanks for share super like this awesome tutorial
love the texture effects! thanks for share Chris!
That’s so great! Really shows how good simple is. Thank you very much for this tutorial. (and your others.)
Awesome Tutorial Chris.Thanks for sharing.
Very simple yet affective tutorial, thanks for your help & sharing.
As you say – simple designs often have the most impact. This looks great. I guess you could also add texture in AI for a slightly different look?
Great tutorial. Already used it to make a poster: http://24.media.tumblr.com/82555b9ce54346fb7392a4742f42375a/tumblr_mgn63e3adh1qanpr1o1_1280.png
Nice Man, looks pretty cool
Another great tutorial. Thanks for sharing Chris!
Thank you for the bests tutorials on the web!
Thanks for the great and fun tutorial. I might use this for our my wedding invitations.
Thanks a lot for this! Inspired me for a tutorial I’d been working on Myself!
Good,
Just a thing :
When you draw you first external shapes, did it with an other stroke color. When you have to delet all of them : select only one and use the tool “selection” / “same” / “stroke color”.
Voila, vous allez gagner un peu de temps ;)
À plus !
Great tutorial, the texture really spice up the design.
superb tutorial of poster design i m learn thanks
WOW! So great! Thanks for sharing, Chris!
A well-designed poster is eye-catching, attractive, and communicates information effectively and economically. The tutorial you shared will help everyone to make a poster perfectly designed. Thanks a lot for sharing.