
This post was originally published in 2010
The tips and techniques explained may be outdated.
The great thing about seamless repeating patterns is that once created, they can be used as a base for all kinds of awesome designs. Skateboard decks, custom apparel, package designs and website backgrounds are just some of the uses for the good old pattern swatch. Follow this tutorial to build a vector based repeating pattern of your own, featuring trendy graphics of skulls, stars, lightning bolts and other cool pop imagery.
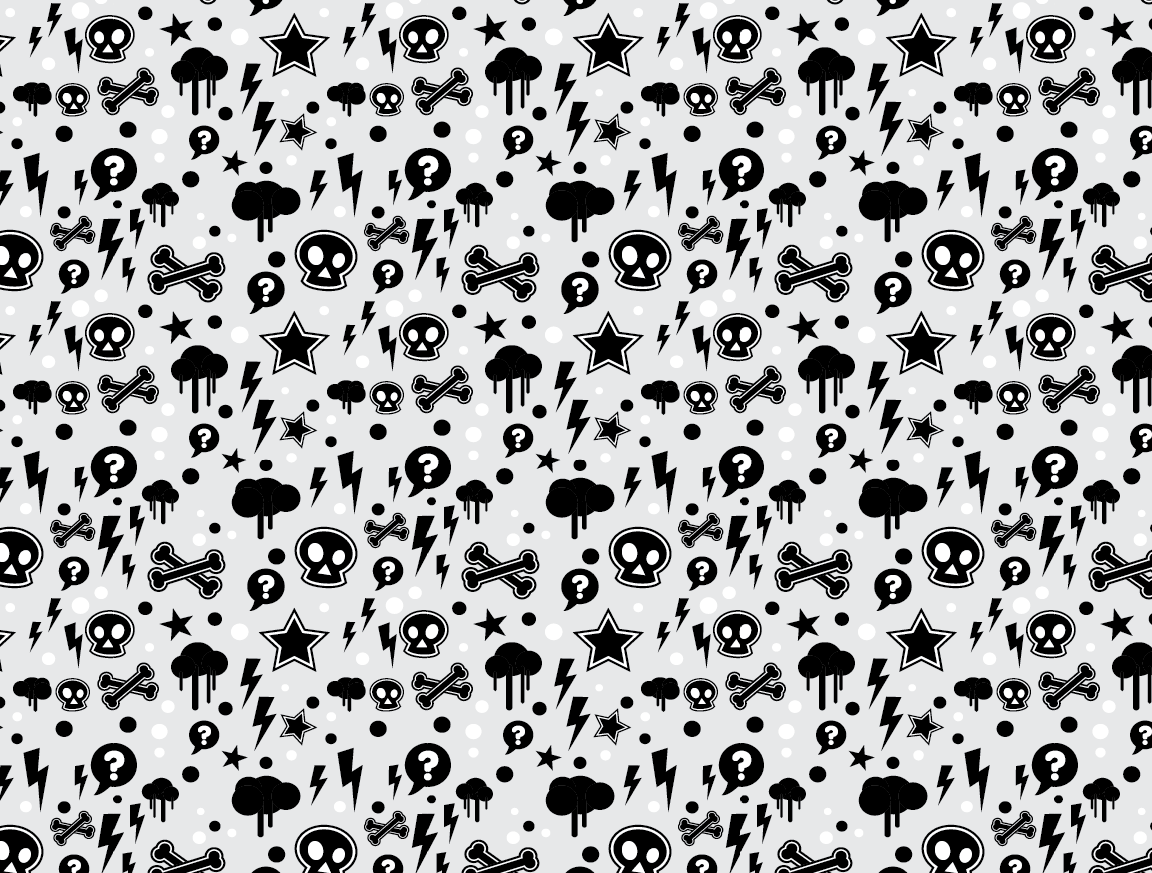
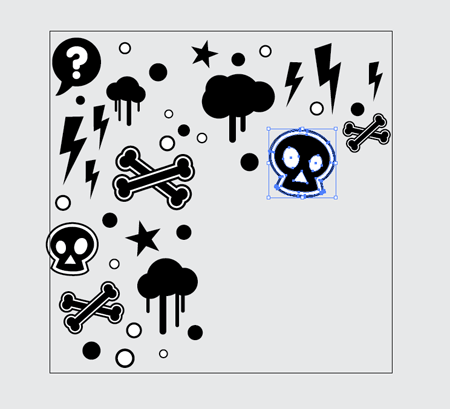
The pattern we’ll be creating has a mono colour scheme of grey, white and black and features a bunch of cool graphics. Speech bubbles, skulls, crossbones, stars, drips, sprays and lightning bolts all help to add that urban/punk pop feel.
View the full size pattern design

Open up Adobe Illustrator. The first graphic we’ll create is the speech bubble. Draw a perfect circle (hold Shift) and give it a black fill. Using the Pen tool, draw a pointed outline to simulate a typical speech bubble shape, overlap this with the main circle then select both objects and click the Unite option from the Pathfinder window to merge them both together.

Use the Type tool to add some form of typographic symbol. Here I’m using a question mark set in VAG Rounded. Center up the mark by eye then group the two objects together.
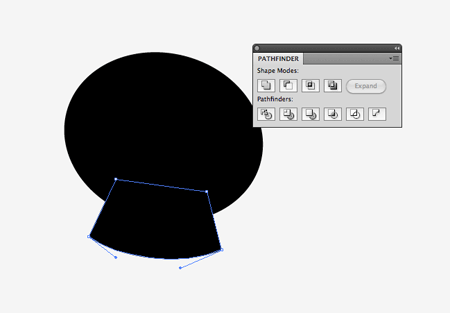
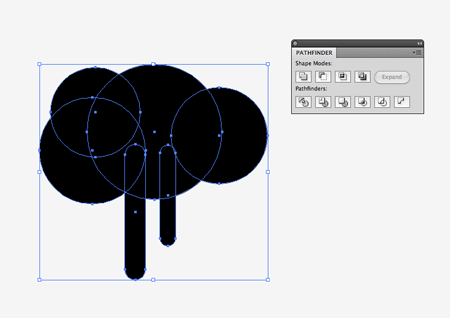
Next we’ll start on a simple skull graphic. Draw an oval with a black fill and rotate it slightly. Use the Pen tool to draw the jaw of the skull, giving it a curved lower edge. Unite these two shapes with the Pathfinder.
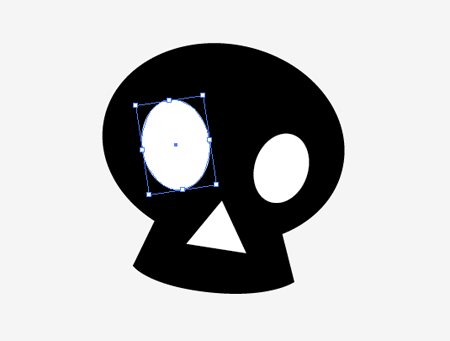
Draw two ovals to form the eyes, rotating each one slightly. Then place a triangle as the nose. To produce a triangle, select the Polygon tool and repeatedly press the down cursor key to reduce the number of points while dragging the shape with the mouse.
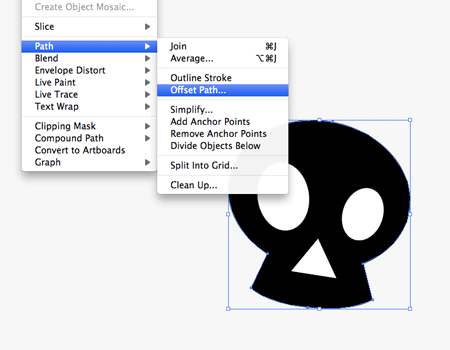
Select the black skull shape and go to Object > Path > Offset Path. Enter 1mm in the options and select OK.
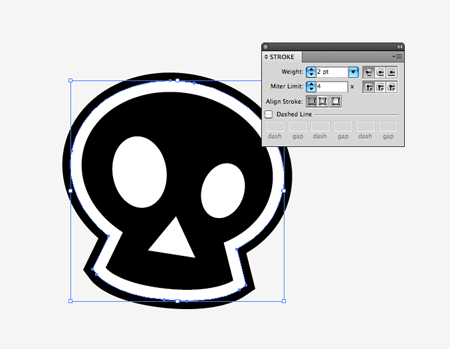
The newly generated shape by default sits at the top of the stack, so press CMD+Shift+[ to send it to the bottom. Swap this shape’s black fill to white with a black stroke. Bump up the stroke to 2pt and align it to the outside. Group all the objects together.
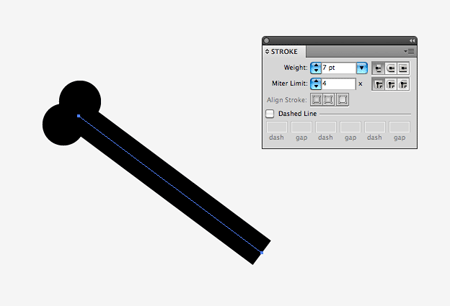
Draw a diagonal line and bump up the stroke to around 7pt. Use two small circles to overlap the line at each end. This forms a basic bone shape for the crossbones graphic.
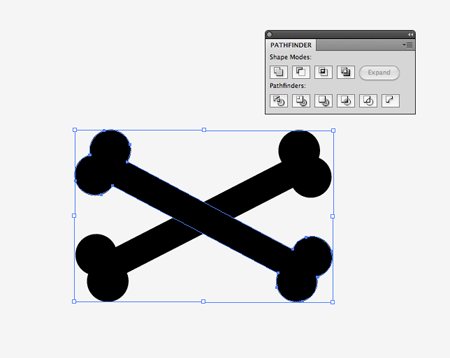
Merge the shapes together using the Pathfinder, then Copy (CMD+C), paste in place (CMD+F) and rotate to form the complete crossbones graphic.
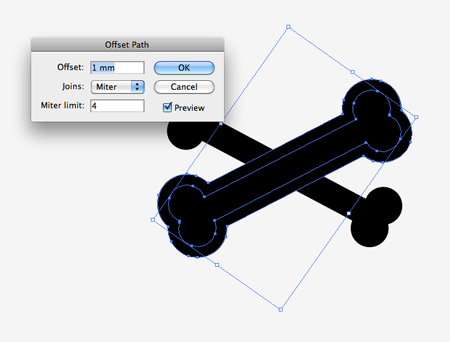
Select each bone in turn and add an Offset Path (Object > Path > Offset Path). Press CMD+[ to knock the new path underneath the inner shape then add the same white fill and black stroke at 2pt as the skull graphic.
Overlap lots of circles to form a simple spray graphic. Use Rounded Rectangles with the maximum corner radius to represent a couple of drips. Merge all these shapes together using the Pathfinder.

Draw some basic shapes as filler graphic for your design. A lightning bolt can be drawn with the Pen tool, circles are easily made with the Ellipse tool and stars with the, errm… Star tool.
Create a new document at 100x100mm then draw a large grey rectangle expanding beyond the edges of the artboard. Begin pasting in your graphics and laying out the shapes within the square.
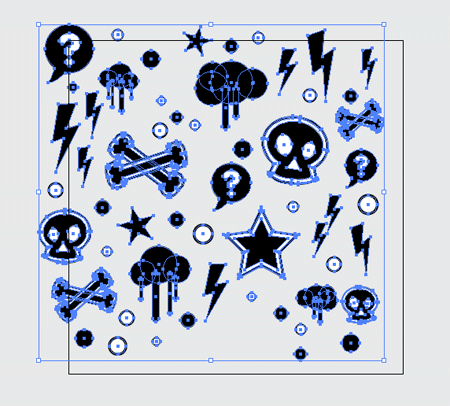
When the design is beginning to take shape, draw a selection over all your objects and move them diagonally upwards to extend outside the artboard.

Copy (CMD+C) then Paste in place (CMD+F) a duplicate of your objects then hit the Enter key to bring up the Move options. First enter 100mm in the Horizontal field, then repeat the process but enter -100mm in the Vertical field. Repeat the process for a third time, but with both 100mm and -100mm in the Horizontal and Vertical fields.
Inspect the areas around the document artboard where the pattern is repeating for gaps. Paste in further objects to fill these gaps but keep them within the confines of the artboard.
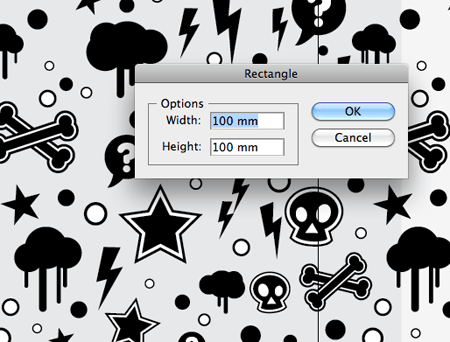
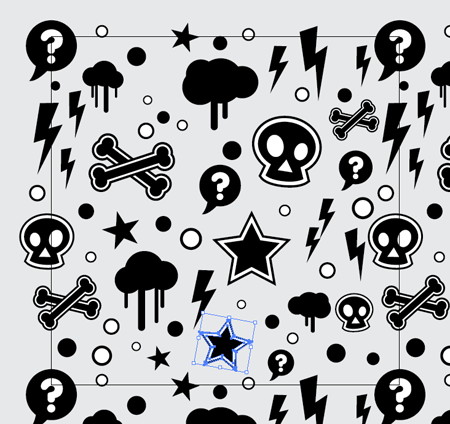
Select the rectangle tool then click on the artboard to bring up the options box. Enter dimensions for a 100x100mm square, clear out the fill and stroke then align the object with the artboard.
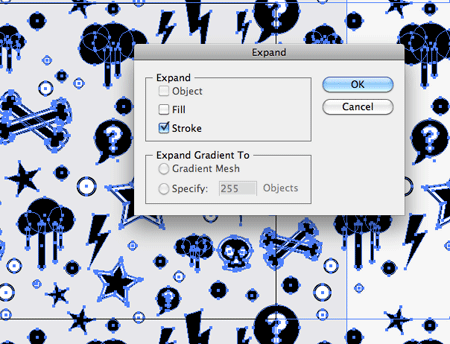
Press CMD+A to Select All, then go to Object > Expand. Select just the Stroke option, this will convert all strokes into solid shapes.
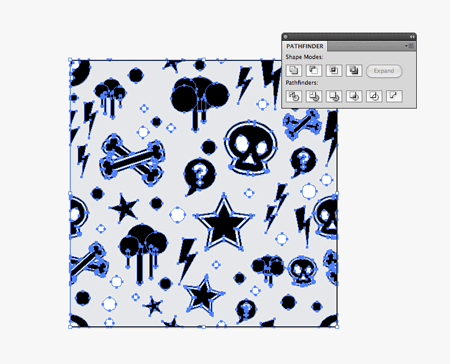
Hold Shift and click the newly created square that’s sitting over the artboard to remove it from the selection, then press CMD+G to group everything else. Reselect this square along with the group of objects and select the Crop option from the Pathfinder window.

The pattern graphic is now complete. To put it to use inside Illustrator we can drag the shape into the Swatches palette. Add this swatch as a fill to any shape to generate the seamless pattern fill.

Awesome tutorial! I actually did one of these a couple of weeks ago, but it kind of turned out not so well. Thanks for the post!
hi chris, you’re so hot! OMG
That looks really cool , a lot of teenagers wear that kind of pattern on clothes and accessories!
lol @ hunk’s comment ahaha
Another awesome tutorial chris – definitely going to be using this in the future.
Thanks for this nice tutorial!
Great tut Chris, nice outcome. Would look good on a skateboard or snowboard deck!
Just what i was looking for, thank you very much yet again Chris.
Useful TRix !
Awesome! Lately, I’ve been getting more into creating repeating patterns for websites. You make it look so easy.
I like the concept. It reminds me of tokidoki :D
I’ve seen a few ways of creating repeating patterns, but this one is new to me so thanks very much.
Awesome work as usual Chris. Really liking these. Top marks here my man.
Thanks for this not done one of these in illustrator for a while but might give it a go.
Might be a bit of a daft question, but im relatively new to Illustrator.
Whenever I get to the point of cropping it simply seems to delete everything. Is there something obvious that I am missing?
Thanks for another great tutorial!
Even after years of using the Pathfinder it still catches me out sometimes. Try selecting all your ungrouped objects (excluding the 100×100 rectangle) and making a Compound Path – Object > Compound Path > Make. This seems to help with the Pathfinder in CS4+
Great tutorial!
Thanks for the kind comments everyone!
shut it
illustrator is always on the top
I was actually planning to do one of these. Thanks for the tips!
I feel like as soon as I open illustrator, my hopes of creating a graphic as cool as yours will be shattered. My friend’s 10 year old would drool over that pattern.
Thanks for the tutorial! I’m definitely going to try something like this today- maybe with initials.
Very busy background but the technique can be used for texturing too.
Thanks for the write up :)
Thanks sooo much! Have been looking for simple tutorial like this for ages! Cheers!!
I wish i had the imagination to do something like that, but I always have trouble in front of a blank canvas :(
Great post…thanks!
http://www.filmai.in/uzeik-6490.html
This tutorial is simple enough for the most amateur user to comprehend. Thanks for sharing this.
Chris, I can’t seem to figure out the offset path. I have my skull made, but all pieces are still individual shapes, etc.
A little help from here?!
Thanks!
nice posting… your tutorial very useful…
Love this tutorial! But I have a (probably pretty silly) question. Everytime I drag a self made pattern to the swatches selection, it does pop up and i can change the name.. but when i open another document.. It is gone from the swatches and I can’t use it! I already tried to quit & restart illustrator but that doesn’t make anny difference..can someone help me?
thank you!
Outstanding tutorial.Thanks a lot.
I love your work man, I bookmarked your site and I love the freebies you give away!
Ben böyle bir film görmedim arkadaşlar süper ötesiydi.Hepinize tavsiye edeirm.
always like your works…keep tutoring….plizz…. very usefull for amateur like me…..^-^