This post was originally published in 2011
The tips and techniques explained may be outdated.
Follow this step by step tutorial to create a retro style typographic poster design with distressed textures and a muted colour scheme. We’ll create a typographic layout based on the number ‘one’ using Illustrator’s easy manipulation tools, then switch over to Photoshop to lay out the poster design composition and grunge everything up with some textures to create that cool dated retro look.
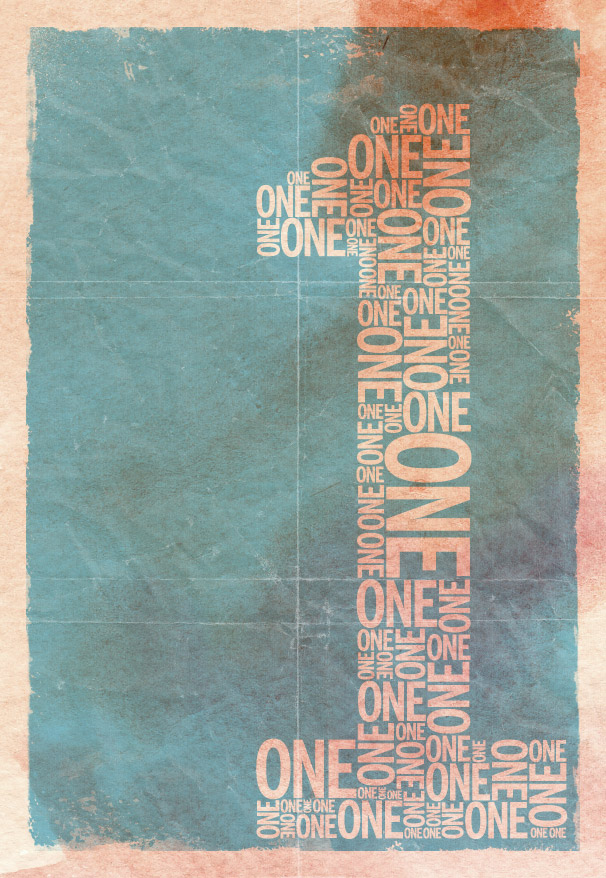
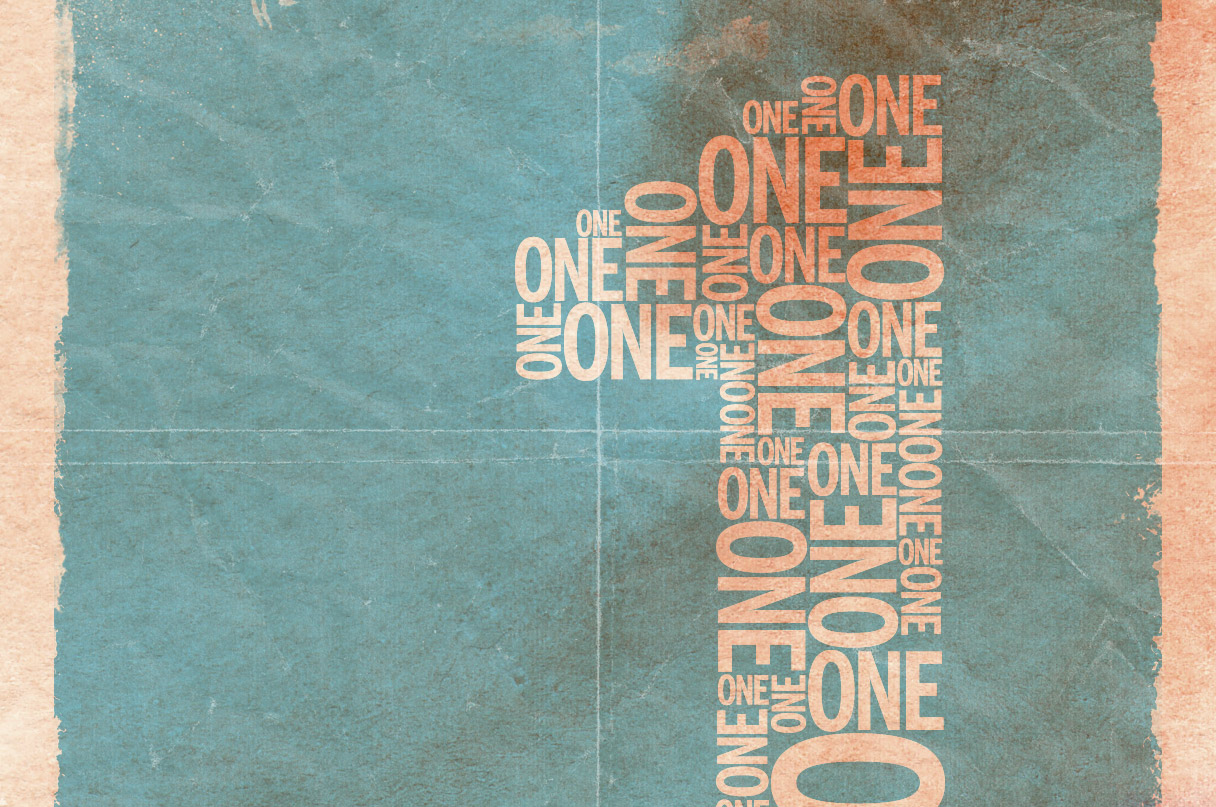
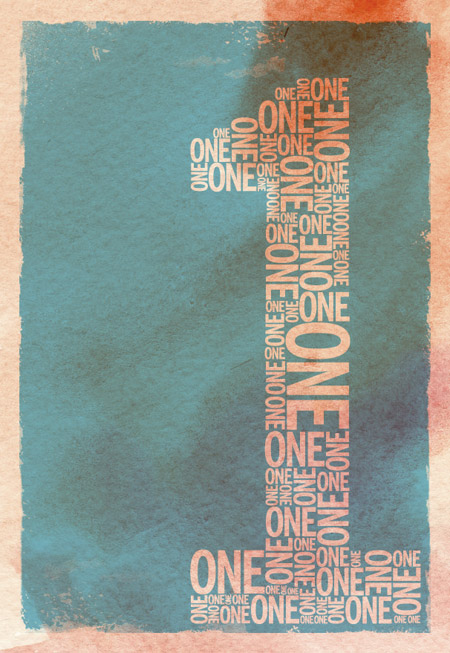
The design we’ll be creating is based on the number ‘one’. It features a typographic design made up of duplicates of the word ‘one’ to build up a numerical number one symbol. The overall design is then composed into a poster and given that cool old school retro appearance with stains, textures and distressed elements.
View the final retro typographic poster design
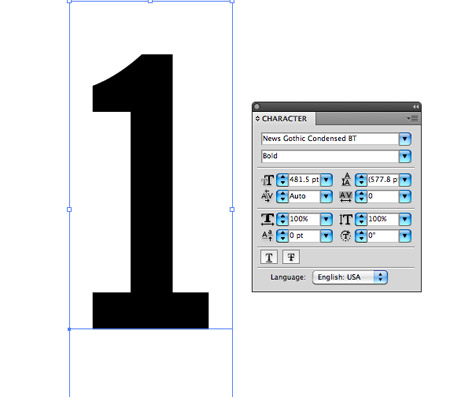
We’ll create the main typographic layout in Illustrator to make use of the vector abilities to maintain crisp edges on our text elements. Type out the number one in a font of your choice. I’m going for the classic News Gothic in a bold weight to give us plenty of space to fill.

Give the number object a light grey fill then lock it into place using the CMD+2 shortcut. This will help avoid us accidentally selecting it when manipulating the smaller elements.
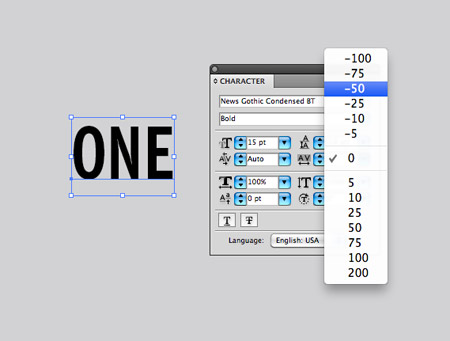
Use the same font to type out the actual word ‘ONE’. Adjust the tracking to tighten up the spacing between the letters. Press CMD+Shift+O to convert the text to outlines.
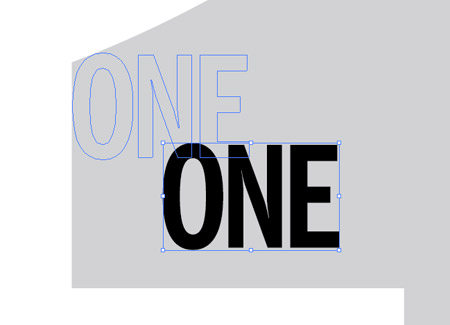
Choose a corner to start laying up the text elements and align the first of many objects to the grey background guide.
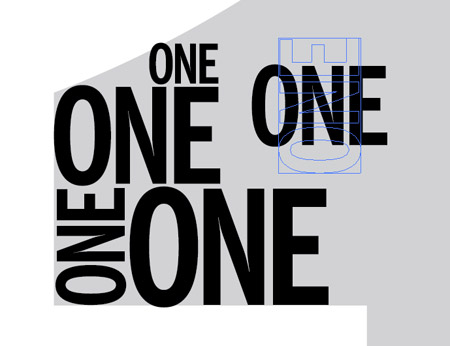
Hold ALT and drag to create a duplicate of the text object, then scale and rotate while holding shift to vary the sizes and angles.
Pay close attention to the lines naturally created by the stacking of text elements and paste copies of the words in to fit.

Continue duplicating, scaling and rotating new elements to fill the whole grey area, working from top to bottom.
Place a few key elements in the corners to outline the main basic shape, then add duplicates to fill out the inner area.

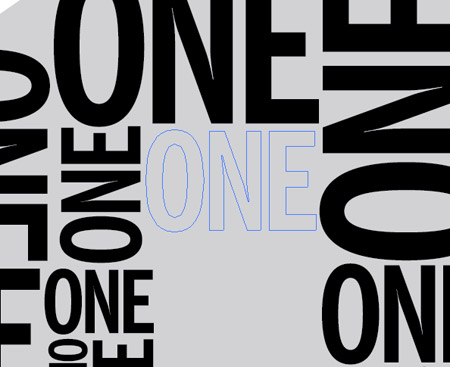
In no time the whole design will be filled with repeating elements. Take a step back to check for uncomfortable areas that may include too many large or small items.

Press CMD+Alt+2 to Unlock All. Draw a selection across all the elements, then Shift-click to remove the background guide from the selection.
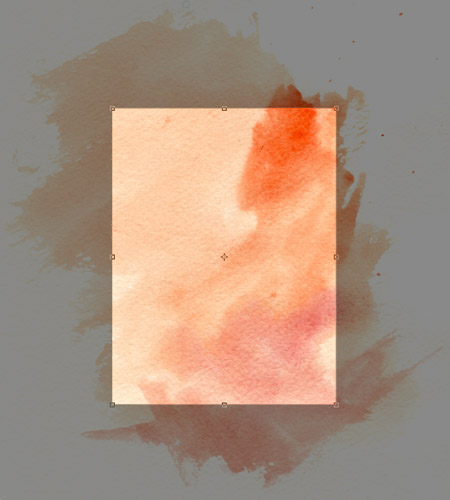
Open up a high res watercolour texture in Photoshop to use as a background. Use the Crop tool to clip the background down to exclude any white page.
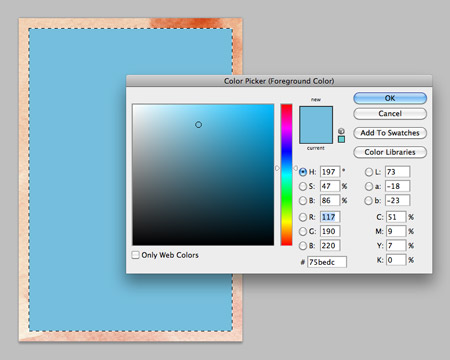
Press CMD+A to select all, then right click and select Transform Selection. Scale it down slightly to create a border effect then fill the inner portion with a bright colour.
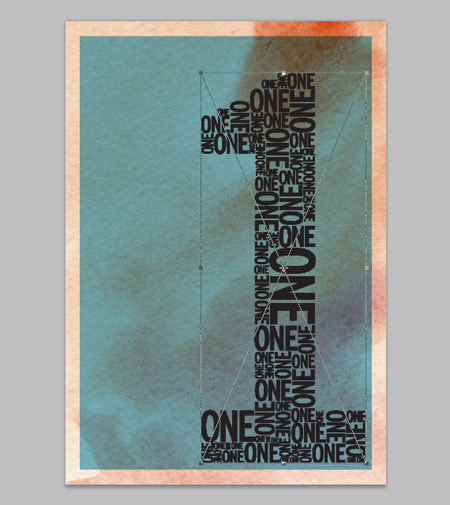
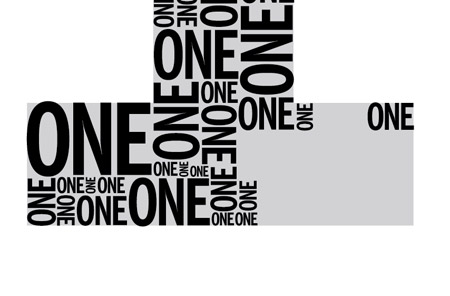
Change the blending mode to Multiply to allow the underlying texture to show through, then paste in the typographic elements from Illustrator. Arrange the composition to extend from the lower right corner.
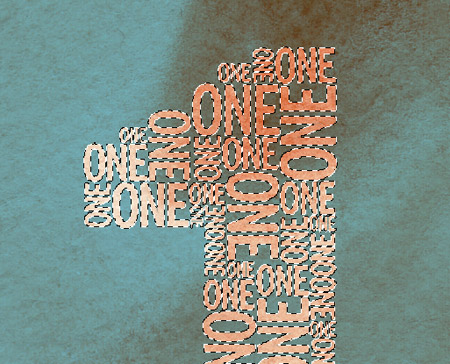
CMD+click on the typographic layer’s thumbnail to load the selection, then delete this selection from the blue panel layer to create a mask or basic screenprint style effect.
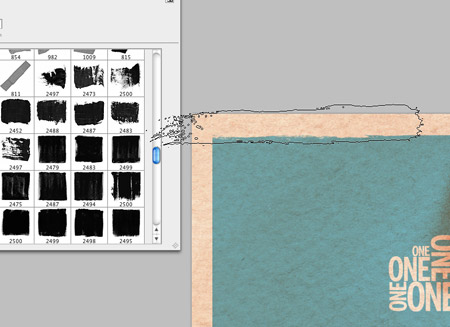
Add a layer mask, then use a selection of rough Photoshop brushes to distress the edges. Open up the Brush palette to adjust the angle of the brush in order to use the brush on all four sides.
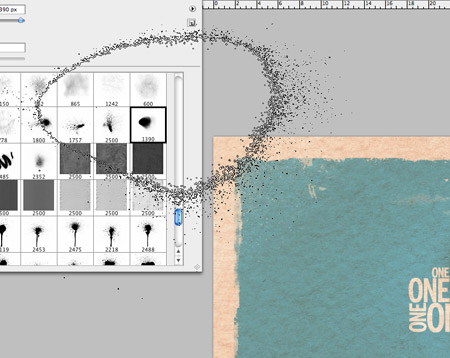
Use a range of brushes from brush strokes to spray paint to add a wealth of different textures.
The Photoshop brushes do a great job of creating that aged, weathered appearance common in any old document that has stood the test of time.
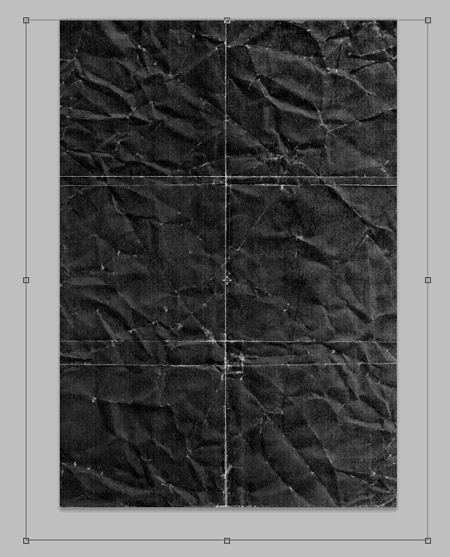
All that’s left is to give the poster a typical creased appearance to give the impression that it has been folded during years of storage. Paste in a folded paper texture file above all other layers and change the layer style to Screen. Adjust the opacity to tone down the impact of the crease lines.
This leaves out cool retro screenprint style typographic poster design complete. Why not get right on with creating a complete series of posters, starting with the number ‘Two’. The collection would look awesome if each poster had a unique colour.

Once again a great tutorial! Thanks Chris!
really neat. i’ve learned so much from your tutorials – -thanks!
Love it. Almost effortless to create something really cool. More techniques for my arsenal. Thanks Chris!
Ok! I love any retro tutorial but this one is just awesome! The dimension on the words inside the one is just perfect!
Very nice tutorial, like always.
Very cool tutorial. Thanks!
I like this tip. Very cool. Thanks!!!
Beautiful effect, and your step-by-step is perfecto. I wish all tutes were as clear and well-organized as yours. Many thanks.
I really liked how you took the crisp, clean vector art from Illustrator & turned it into something old & worn out in Photoshop. Perfectly shows the difference of the 2 applications & how you can unite them.
Awesome tutorial! You just made yourself a new fan. You are now in my favorites and I plan to use many more of your tutorials, thank you!
Nice ONE!!! ;)
I always admire retro style work!! Nice tutorial Chris… as always! :D
Nice!! I love it. Thanks for your tutorial.
Hey, that’s where all these visitors on my Flickr stream come from :-) Thanks for using one of my textures in your tutorial Chris and thanks again for crediting it!
very informative tutorial. i learned many things in it.keep it up man. and we hope for another good blog.
Great tutorial, thanks!
Ah, just when I was needing this roughed edge tutorial. LIFESAVER CHRIS!!!!
Nice!! I love it. Thanks for your tutorial.
I really liked how you took the crisp, clean vector art from Illustrator & turned it into something old & worn out in Photoshop. Perfectly shows the difference of the 2 applications & how you can unite them.
Beautiful effect, and your step-by-step is perfecto. I wish all tutes were as clear and well-organized as yours. Many thanks.
Very cool tutorial. Thanks!
Awesome tutorial! You just made yourself a new fan. You are now in my favorites and I plan to use many more of your tutorials, thank you!
I always underestimate the power of a few good brushes and stock images. Thanks for sharing this.
Cool tricks, I’m not really good with photoshop with your blog i think i might get a little better..
P.S Great blog
Great tutorial! I stink at graphic design and it’s not often I can actually follow along! Thanks.
Thank you for such a a wonderful tutorial, with incredibly clever tips. You are an angel for an aspiring graphic designer like myself :D
Great tutorial man!
I’m a bit new at this, and having trouble pasting the typographic element into Ps- what’s the best way to import it? If it’s a straight paste, what do I paste it as?
Actually, ignore that- got it now :) Thanks very much for the tutorial.
I love how you always have interesting posts. Very creative, keep them coming!
Very cool tutorial. Thanks!
I LuV this tut!!! really Good! :D
Another awesome tutorial. Thanks Chris, keep them coming
Thank you so much!! That was so easy … I am sure anyone will appreciate more tutorials like this. Many thanks!
You are No.1 Designer!!
what a creative tutorial, i think i’ll make some one like it :) thanks alot
Thanks a lot. Really good tutorial :)
Great step-by-step, however, when I pasted the Illustrator text into Photoshop the type was pixelated and just not as crisp and clean. Any tips on how to correctly scale the text? Thanks.
p.s.- I am an extreme novice. Self-Taught.
Awesome, Mind blowing
what is the sourse code?
Thats a cool tut … Great Job !!!!
Tnx really nice tutorial again:)