This post was originally published in 2011
The tips and techniques explained may be outdated.
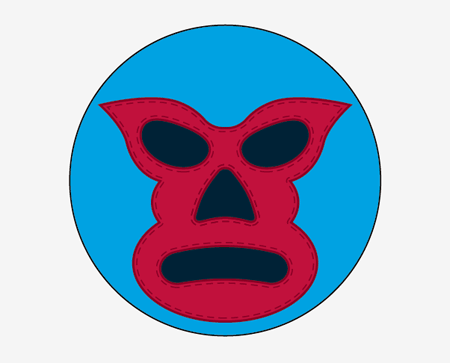
Follow this step by step Illustrator tutorial to create a Mexican Lucha Libre inspired badge design. We’ll be creating a vector mask design out of various shapes and elements before pulling the whole design together onto a template to form a print ready 25mm button pin badge.
![]()
The design we’ll be creating takes inspiration from the awesome masks used in Mexican Lucha Libre wrestling. By merging together various shapes and adding bold colours we can create a cool stylized illustration that will work well at small sizes as a button badge.
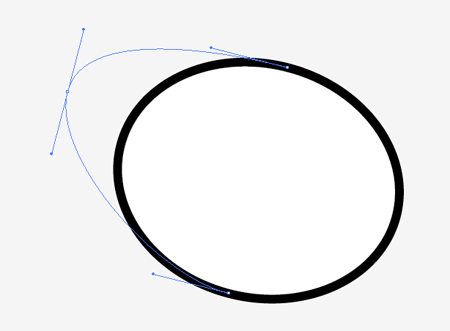
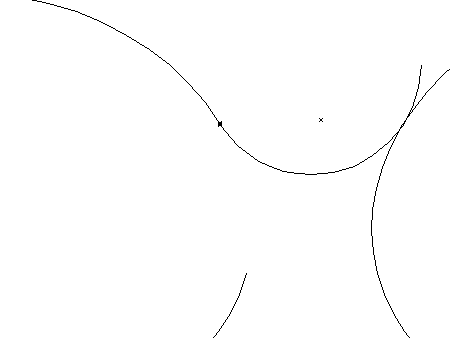
Open up Adobe Illustrator and draw an oval onto the artboard. Rotate the oval slightly, then grab and move the left point further outwards with the Direct Selection Tool.
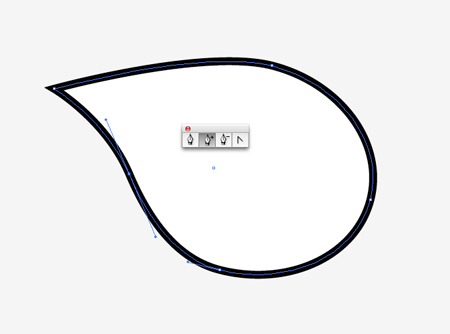
Use the Convert Anchor Point tool to remove the bezier curves to form a sharp point, then use the Add Anchor Point tool to insert an extra point in the lower left portion of the path. Move this new point inwards and rotate the curves slightly.
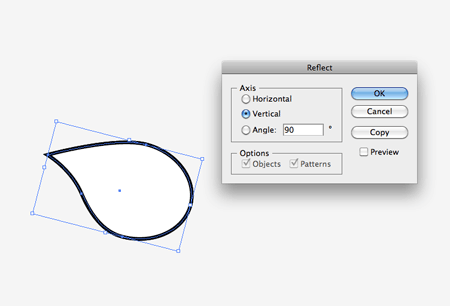
With the teardrop shape selected go to Object > Transform > Reflect and choose the Vertical option.
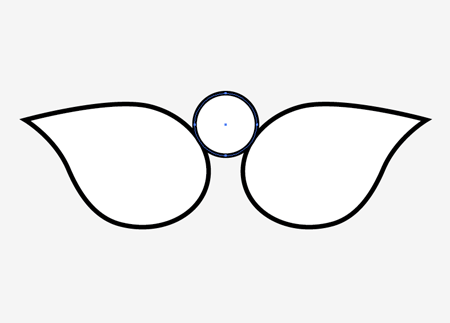
Position the duplicate at an appropriate distance to represent the outline of the eye section of the mask. Draw a small circle and position it accurately between the two elements so the paths overlap exactly.
Toggle outline mode (CMD+Y) and zoom right in to the design in order to accurately clip the paths with the Scissors tool. Use the Direct Selection tool to delete the unwanted paths, then join each end point to form one smooth outline.
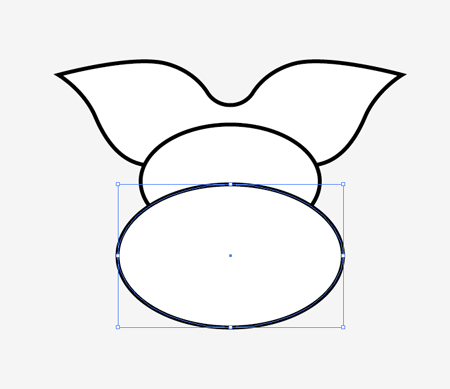
Draw and position two more oval shapes overlapping the eye piece to finish off the remainder of the mask outline.
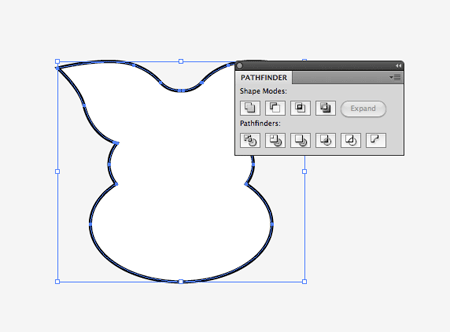
Select all three shapes and blend them together using the Merge option from the Pathfinder tool.
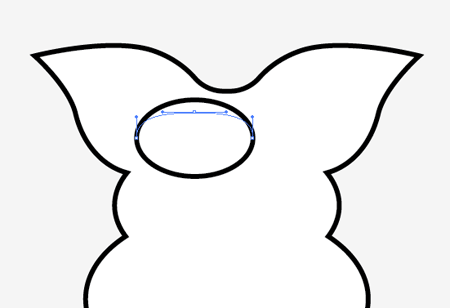
Draw a smaller oval and drag the top most point downwards to squash the shape. Rotate and position this object as an eye hole, then reflect a duplicate and position it on the opposite side.
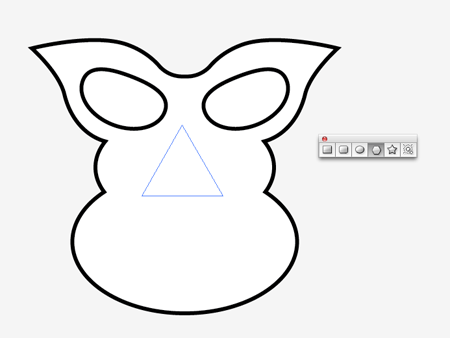
Use the Polygon tool to draw a triangle by pressing the downward cursor key to reduce the number of points.
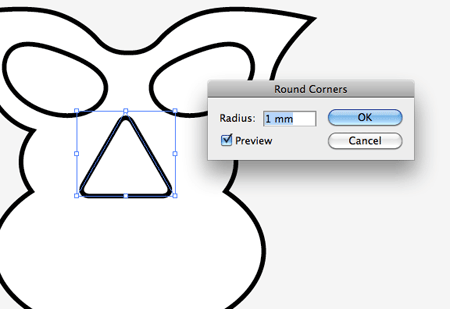
Go to Effect > Stylize > Round Corners and enter 1mm in the Radius field.
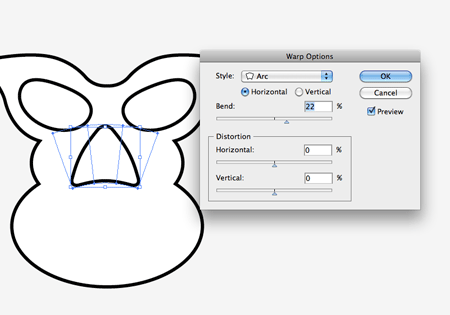
Head to Object > Envelope Distort > Make with Warp and adjust the Bend slider to around 22% to manipulate the shape of the triangle. Go to Object > Expand and select just the Object checkbox to make the effect permanent.
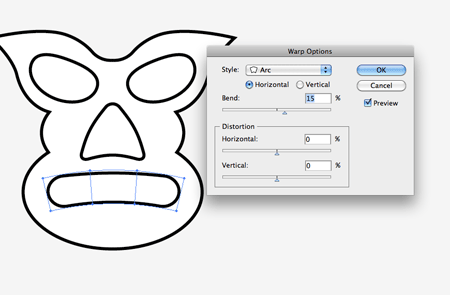
Draw an Rounded Rectangle as a mouth piece and give it a slight bend using the Envelope Distort tool. Remember to expand the effect to convert it into an editable shape.
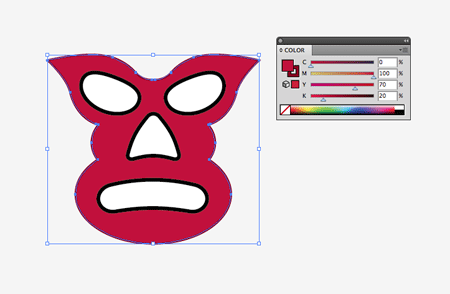
The basic linework is complete, so let’s add some colour. Give the main mask shape a bold red fill, then add a 0.5pt stroke with a slightly darker red tone.
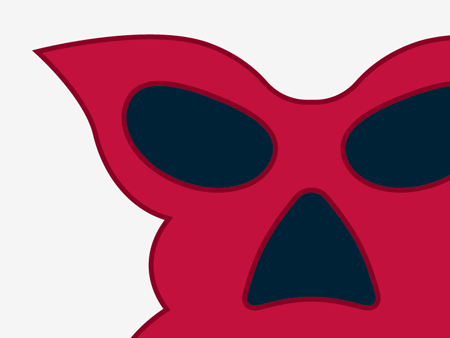
Give the facial feature elements a deep blue fill and add the same dark red stroke as the mask outline.
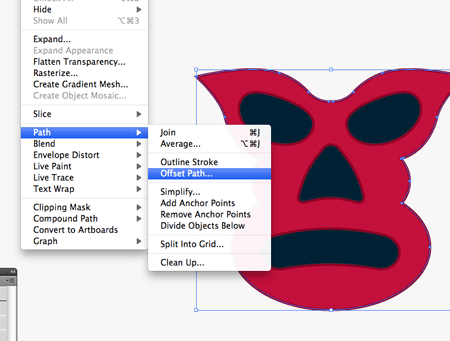
Select the main outline and go to Object > Path > Offset Path. Enter -0.4mm in the options window.
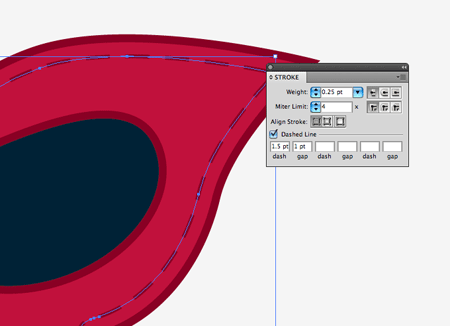
Clear the fill from this new offset path and alter the Stroke to 0.25pt with the Dashed setting activated with figures of 1.5pt dash and 1pt gap.

Select the facial elements and choose the Offset Path setting again, this time enter 0.4mm in the options window. Give these new paths the same dashed stroke styling.
Add a circle with a cyan fill to preview how the finished badge design will look. Use the shortcut CMD+Shift+[ to send the circle behind the mask elements.
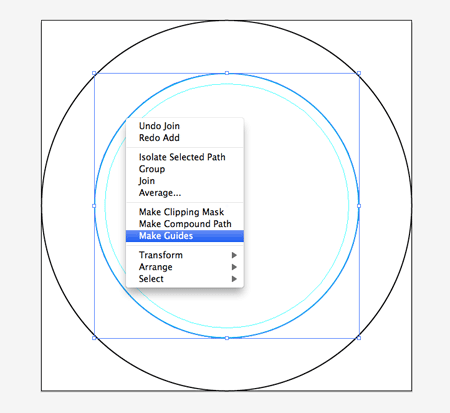
Create a new document for the badge artwork template at 35x35mm. Within this document select the Circle tool and click on the artboard. Enter the figures of 35x35mm and center this circle with the Align Palette. Draw and center two more circles at 25x25mm and 23x23mm then right click these smaller shapes and select Make Guides.
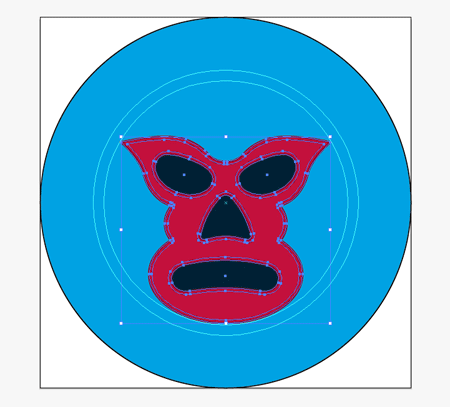
The larger 35x35mm circle takes into consideration the bleed of the design that wraps around the back of the pin badge. Fill this circle with the blue background. The smaller two circles represent the final 25mm pin badge size and a safety margin to avoid having the design lost on the edges. Scale and position the mask design inside this safety margin.
![]()
Your vector Lucha Libre badge design file is all ready for print. Take a copy of the design into Photoshop to quickly crop the artwork and add a Bevel effect to preview how the final badge will look.
Great Tut Chris… Hope you had a Fantastic New Year and all the best with your two blogs for the year Ahead. Keep them coming !
Thanks Leigh, a Happy New Year to you too!
You are an amazing graphic designer. Your tutorials are always very straightforward and easy to follow. (:
Thanks Maddy, glad to hear the tuts are helping out.
Nice Tutorial look like Ribbon , happy new year :)
Quick and awesome! love this tut too.
beautiful badge designing also sharing tips and tricks.
You are an inspiration to me thanx for the tutorial , though i also do all this thing but just started my blog this last december.. do give me some tip to increase my traffic as well.
Cheers and good luck
I would love some Tips too!
Just keep plugging away and posting interesting content. It might take a year or more to gain decent exposure, but if you’re having doing it that’s all that counts.
great tuts chris
Looks really cool…
Nice tutorial, I LOVE your website btw, great design!
This one is great 2! ; )
Being a professional wrestling fan, this is right up my street! Cheers, Chris.
Nice one Chris, love it!
Happy New Year first of all Chris! And secondly, thanks for this cute tutorial, it’s really easy to follow :)
Hey te quedó muy bien!! me gusta.
Great tutorial!! Thanks!!
Great tutorial!! Thanks a lot!!
Great Tutorial. Wish there was someone like you doing the same quality tutorials for InkScape … who can afford Adobe Products?
Awesome tuts, love your websites and attention to detail.
Thank you
lol I actually think the background for that pin is the coolest part.
I want to inform you that freevector-freeclipart.com/ is using your header illustration.
nice tut and easy to follow. it takes simplicity and skills to be a true artist. enjoy the year ’11
Awesome tutorial. It really amazes me that some of the best illustrations can be re-created by following the most basic designs. This gives me hope!hee
Looks really cool…
I like how you use the warp effect and the «stitched» line is nice.
hahaha … great tutorial!
great tutorial i look forward to seeing some more from you something more detailed on vectors would be good
thanks.
really very nice tutorial .. good work