This post was originally published in 2010
The tips and techniques explained may be outdated.
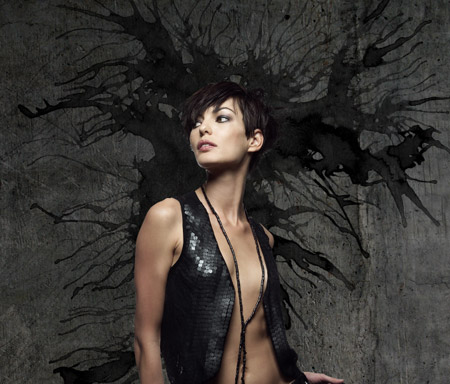
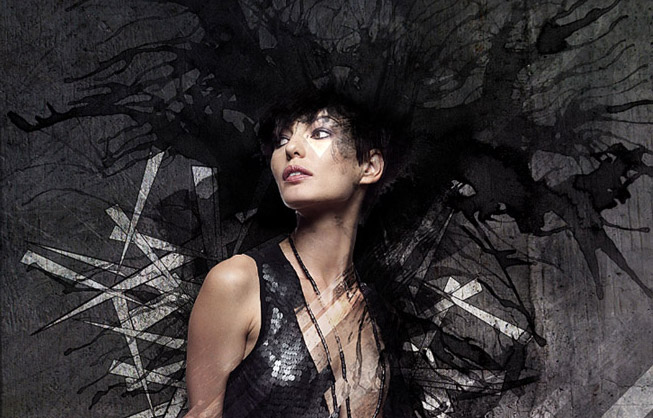
Follow this step by step design process for my recent digital art piece, Vogue. The design combines textures and distressed elements to create a dark and beautiful theme. Learn how a range of Photoshop techniques pull together the various elements to create the final design.
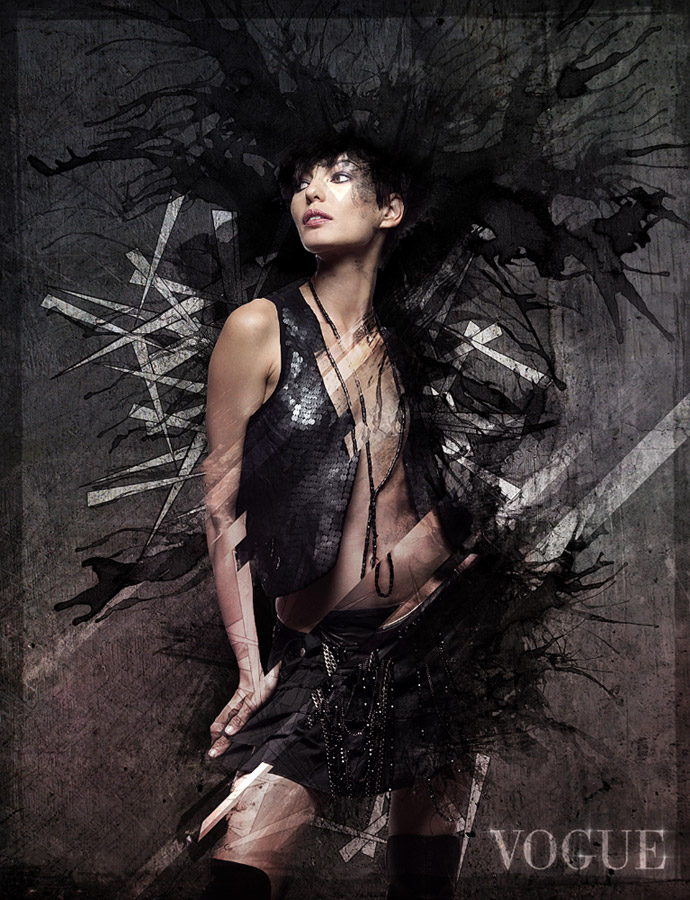
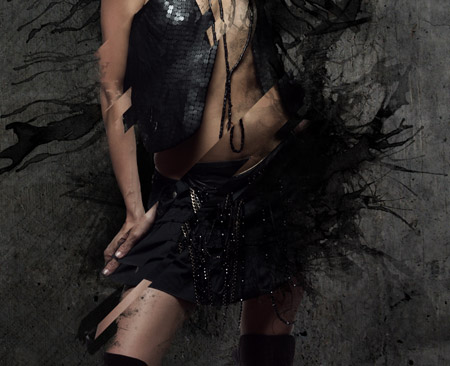
Vogue combines the beauty of the female model with a range of grungy/dark textures and abstract elements to create an eye catching and interesting design that blends the two contrasting themes.
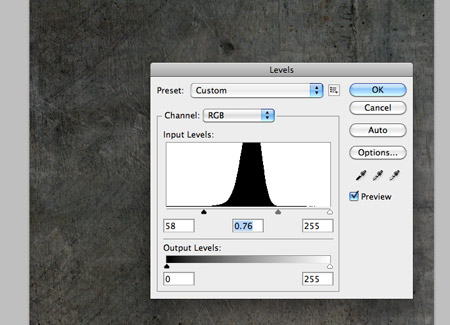
Open up Photoshop and import a nice base texture to form the background of the design. This particular concrete texture is from LostandTaken. Adjust the Levels to darken the tones of the texture file.
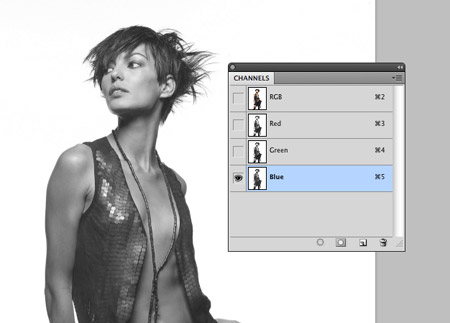
Next we’ll need to source a stock photo as the main subject of the design. This rather lovely female model image is courtesy of Katanaz-stock. Find the channel with the darkest tones and drag that layer to the ‘new icon’ to duplicate that particular channel.
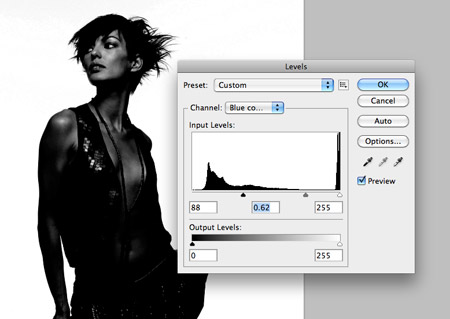
Adjust the Levels of the duplicated channel to really blacken out the majority of the image, but keep an eye out for the edges becoming pixelated or distorted as the contrast increases.
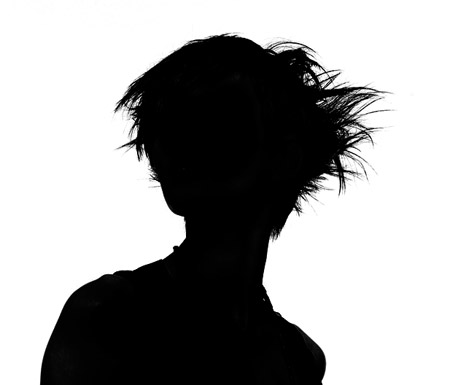
Use a mixture of the Burn tool and a black brush to fill the centre areas of the image black. CMD-Click the channel thumbnail to load the selection, then toggle off the visibility of the duplicated layer and turn back on the original RGB channels.
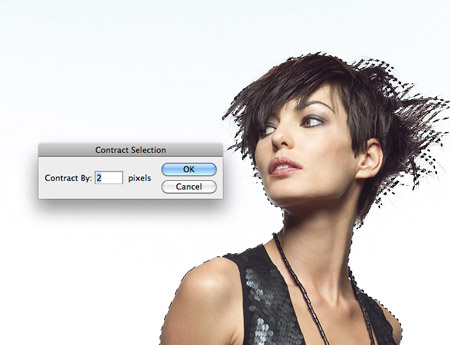
Go to Select > Modify > Contract and enter 2px in the options box. This will help avoid clipping a thin white outline around the subject. Make a copy and paste it into your main design document.
Zoom in and check the edges for any unsightly white clippings. Use the Burn tool to remove these tiny white patches so the model sits seamlessly on the background.
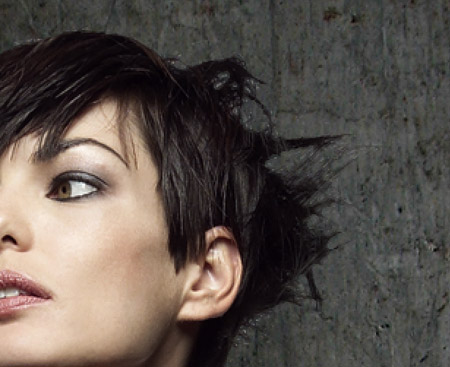
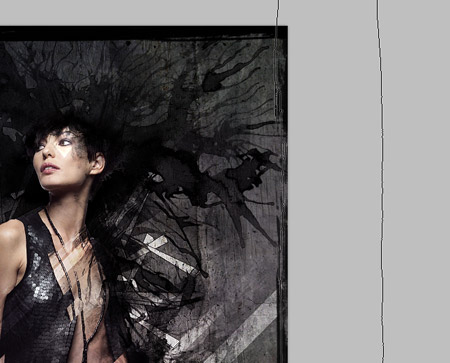
Source a stock image of an ink splatter and paste it underneath the model layer. Change the blending mode to Multiply to render the white areas transparent.

Use some watercolor Photoshop brushes to add more distressed black areas around the model, particularly around the edges of the black clothing.
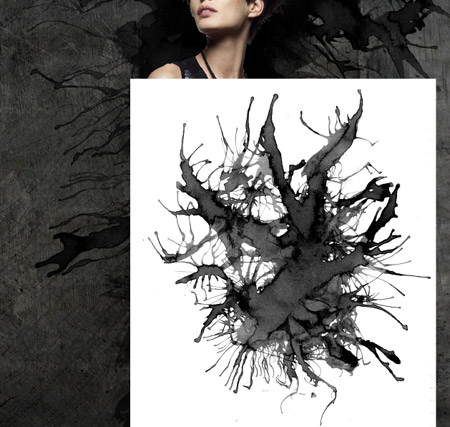
Add another ink splatter image to the skirt area to blend this portion of the model into the background.
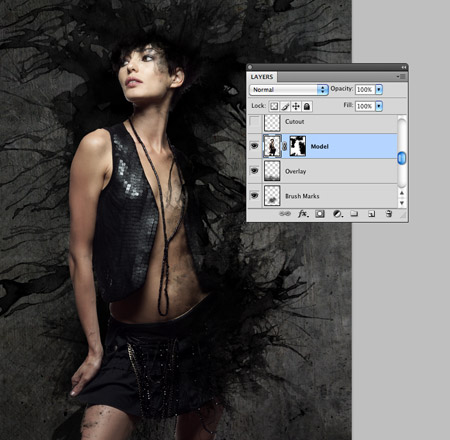
Add a layer mask to the model layer and use a range of distressed Photoshop brushes to erase out portions of the model to seamlessly blend the black areas with the dark ink textures to give the impression that the model is emerging from the grungy elements.
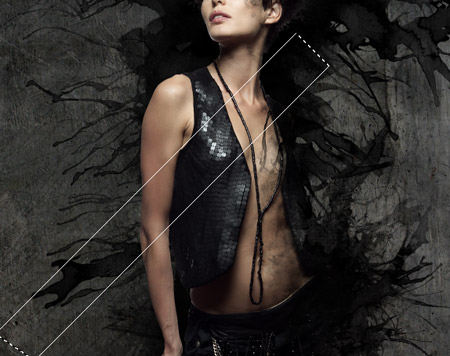
Use the Polygonal Lasso tool to draw a thin diagonal selection over the design. Press CMD+Shift+C to Copy Merged and paste back into the document. Move this new selection to offset from the original to create an abstract effect.
Erase out the hard edges using a grungy brush on a layer mask to limit the offset effect to the model’s body.
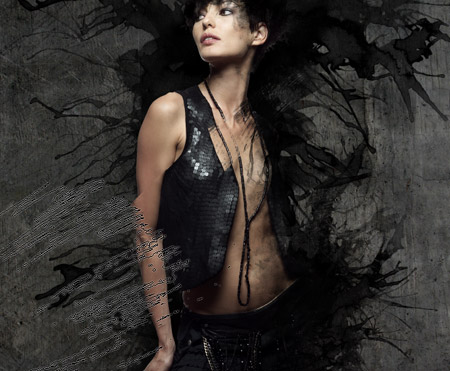
Create a series of other offset effects across the design each at a different size and thickness.
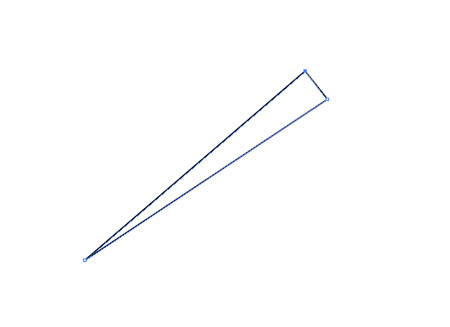
Switch over to Adobe Illustrator to create a simple triangle shape with the pen tool. Copy this shape and paste it into the Photoshop document.
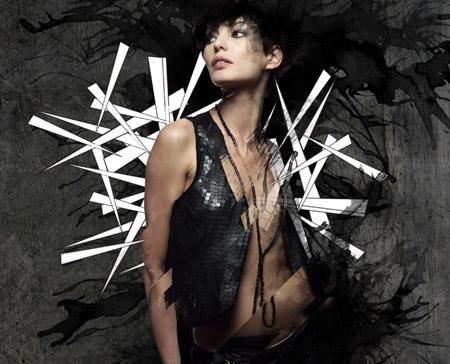
Randomly rotate and scale multiple copies of the triangle to create a series of shard elements. Position groups of shards to flare from behind the model.
Change the blending mode of the shard to Overlay. The overlay effect alone isn’t quite powerful enough, so duplicate the layers and adjust the opacity of the new layers to give the shards more prominence.
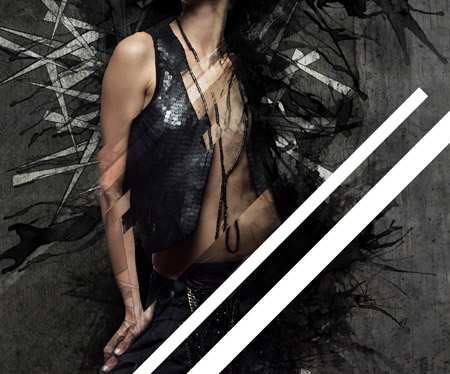
Draw more rectangular selections across the document, but this time give them a white fill. Change their blending modes to Overlay, adjust the opacity and erase out the edges with a layer mask.
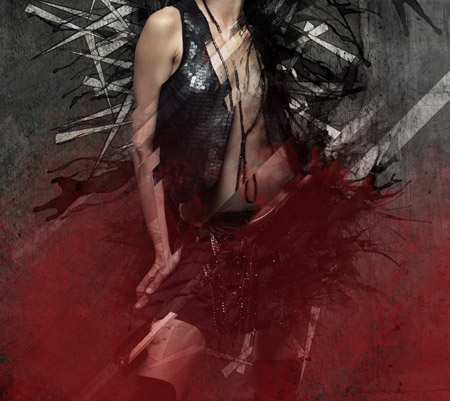
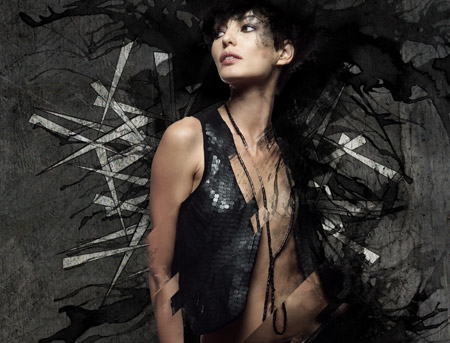
Use a large grungy brush to add a red fill to the lower portion of the design. Change this layer to Color Dodge and lower the opacity to leave a very subtle colour cast.
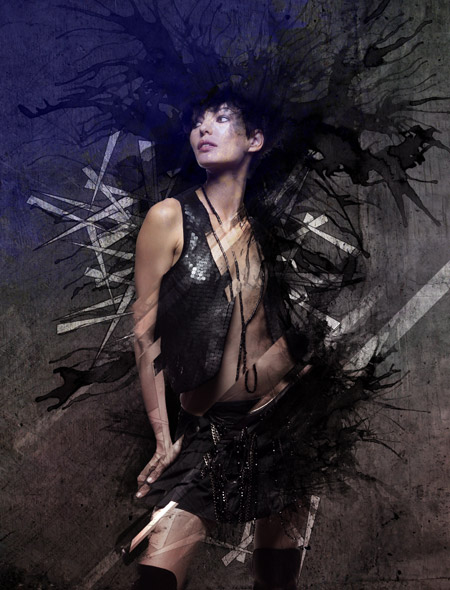
Add an area of blue to the top corner, followed by a strip of purple in the centre. Change these layers to Soft Light and adjust their opacities to create more subtle colour casts.
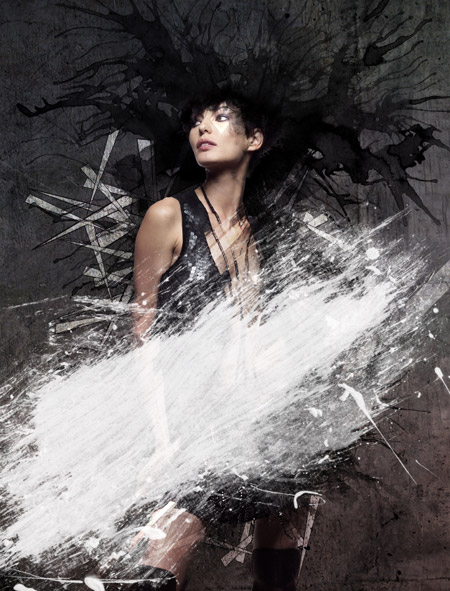
A grungy white brush stroke in the centre of the canvas set to Overlay will brighten up the details in this otherwise darker portion of the design.
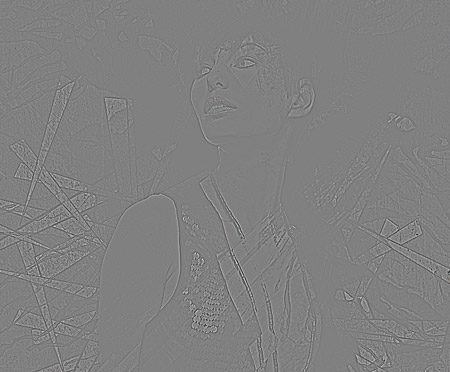
Press CMD+A to Select All, CMD+Shift+C to Copy Merged and CMD+V to paste in a copy of the whole design at the top of the layer stack. Go to Filter > Other > High Pass and adjust the settings so the details are just visible from the grey backdrop.

Set this high pass layer to Linear Light at around 50%. This layer really sharpens up the design and brings out the tiniest details. Add a layer mask and erase out portions around the edges to create subtle changes of focus.
Use some long brush strokes to create a border around the canvas to frame the design. Set this border to Soft Light at 65%.
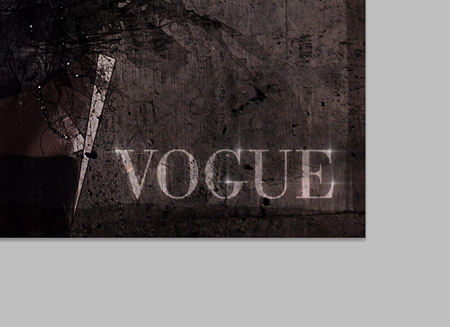
Finish off the design with a title. Here I’ve added the title ‘Vogue’ in suitably beautiful Bodoni font and set the layers to Overlay. A few highlight brushes help add some pretty sparkles to the text.
LOVE IT. Great tutorial as always. :)
Wow this is stunning! I can’t wait to give this a go over the Christmas break! Thanks Chris =D
Wow! this really good one! i like the grungy look.
Really great result and tutorial!
High-impact stuff Chris, great piece of work!
She looks cold. But great. But definitely cold. ;-)
Cool! I started working on something similar last week I shall be sure to take your techniques on board too!
SOOOOO AWESOME!
Awesome work Chris :)
Good work. Great tutorial. Thanks you Chris.
Hi Crish,
Very nice images with the great information, thanks for the sharing.
Corwin
Chris i think you need to add more effect for Picture!
but always it’s look Pretty Cool like that,
thanks
Nice! Love it.
Great! as usual..
Bookmarked to work on later! :) cant wait… looks awesome!
Nice try, but Chris in my humble opinion, this is not your style of work, right? , there are some areas need to be improved such as the hair and background splash doesn’t blend well, it seems some work is still left with the art piece, anyway overall the tutorial is good, thanks again for sharing…
Nice try, but Chris, in my humble opinion, i somehow feel that this is not your style of work, there are some areas which needs attention such as the hair of the model did not blend well with the background splash, it seems that something is missing in the art piece , anyway overall the it is a good tutorial, thanks for sharing…
Great tutorial! Thanks.
nice work! but it is too complicated to do this job.
Very nice pice of work you created. I’m very impressed. Will suggest this tutorial for our designers.
Thanks for the impressive tutorial, all i can say is WOW ;)
Awesome, thank you.
Very cool. Love this style…
Great Job and nice tutorial. I am gonna give it a try :)
Very inspirational and informative thanks a lot. cipro
Thanks for the tutorial. I will give it a try.
Very nice. Keep up the good work
Had great fun with this tutorial.
This is my effort, though a little bit different:
http://www.renlish.com/2010/12/allure/
Thanks Chris. :)
Had a bash! :)
Great tutorial Chris!
http://www.flickr.com/photos/danbicker/5307781187/
Muchas Gracias.
Congratulations!!! Great Tut!!!
N!Ec tutorial i will give it try .
You are an amazing graphic designer
I’ve been searching the web and looking for an online tutorial about looking grungy and dark. I tried it and I was amazed by how ragged it turned out! I had so much fun doing experiments with the layering and using different textures. How cool is that?!!
creative works
thank you for amazing tutorial :D
Great effect! Thanks for the info!
its a awesome work dude n hope u will cary onnnnnnnn
Wow!
im stuck a
“Use the Polygonal Lasso tool to draw a thin diagonal selection over the design. Press CMD+Shift+C to Copy Merged and paste back into the document. Move this new selection to offset from the original to create an abstract effect.” :c
reat effect! Thanks for shariing