This post was originally published in 2009
The tips and techniques explained may be outdated.
I recently finished up a project with Scott McIntyre of Vivid Ways and Jon Phillip of Spyre Studios. My part in the project was to work on a new logo design for the Vivid Ways website and brand. Here’s my design process and a walkthrough of how the final logo is created in Adobe Illustrator.
Vivid Ways is a new blog focusing on the topic of personal development and colourful living, it aims to inspire and encourage readers through ideas and tips on how to live an amazing life.
After some initial correspondence with Scott and Jon via email we had fleshed out some thoughts on the style of the logo and what values would be presented through it. Examples of a previous design were supplied, and it was mentioned that the sans-serif font used was ideal. One other requirement was that the logo should use a separate graphic element along with the Vivid Ways wording. Otherwise, there was creative freedom surrounding the design – which is always nice!
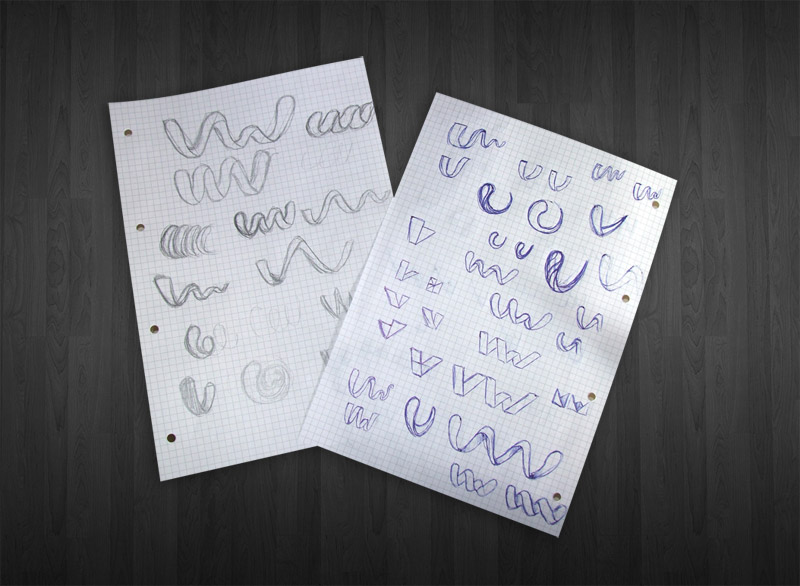
I started work sketching out my ideas for the logo, my main focus for the graphic of the logo was to display the letters V and W in a creative way that could be seen as an abstract mark, but also recognisable as the letters under closer inspection.
After conducting a little research, it occurred to me that the ribbon is a widely recognised symbol of life, so I concentrated on drawing up a ribbon that flowed and twisted into the shapes of letters V and W. The two styles that stood out were the straight/folded effect and the smooth/curling version, both of which represented the same message but in different visual styles.
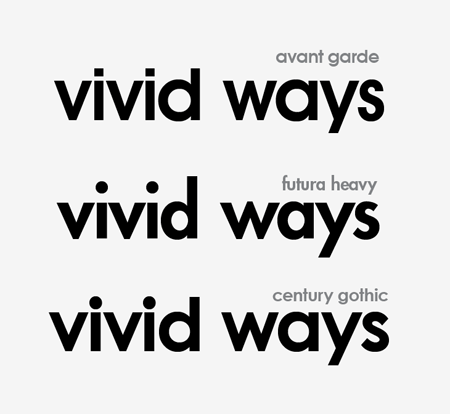
The logos graphic were then drawn up in Adobe Illustrator and experiments were conducted on the appropriate type styles. During the project commencement an example of a font was given, which I managed to identify as Century Gothic. Being a standard Windows font, I decided to compare it to two classics with similar letterforms: Avant Garde and Futura. I was expecting to go ahead with Avant Garde, but when placed side by side Century Gothic actually looked the nicest. I felt the letter S of Avant Garde and Futura was way too thin for the logo.
Colour wise, blue was an appropriate choice with it representing mind, body, confidence and intelligence in colour theory. It was also used well in the website design mockup.
Another idea for the colour of the logo was to take inspiration from the word vivid, and use a complete spectrum of colour. Combining both these colour concepts with subtle shading also helped boost the impact of the graphic with a three dimensional appearance.
Concepts were supplied to Scott and Jon and great feedback was received. Concept A with the smooth wave was the preferred graphic, but it was asked if it could be tried with the colouring and font choice of Concept B.
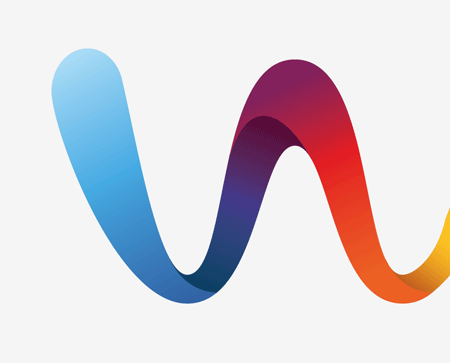
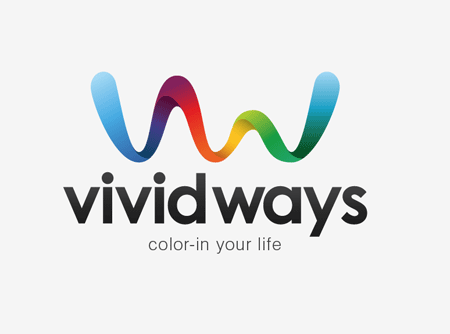
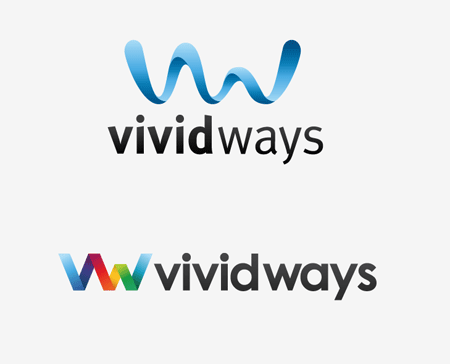
The final logo combines the strong waving graphic and vivid colour scheme and the smooth shapes of the typeface making for quite an impactful design.
Creating the Logo in Illustrator
With this background knowledge in mind, let’s take a look at the technical side of the design and see what processes are used to create this graphic in Adobe Illustrator.
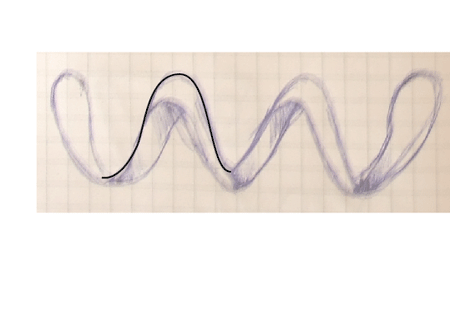
As previously mentioned, the logo started out as a bunch of sketches, these were developed on paper and the designs I was happy with were scanned in.
In Adobe Illustrator the image was placed on a locked layer, the outline of one of the peaks was traced and taken to one side. It was important not to trace the sketch entirely because there wouldn’t be any accuracy, instead the elements were laid out to specific measurements to ensure the logo would look good even at large sizes.
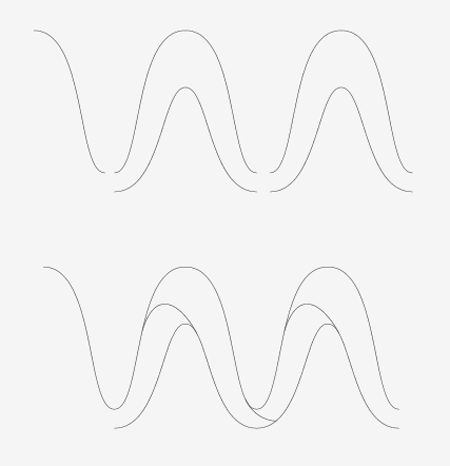
The peak outline was then copied and pasted, then moved to the side until the lines connected.

The paths were then edited with the Scissors Tool, and joined in specific places to make solid shapes out of each segment.
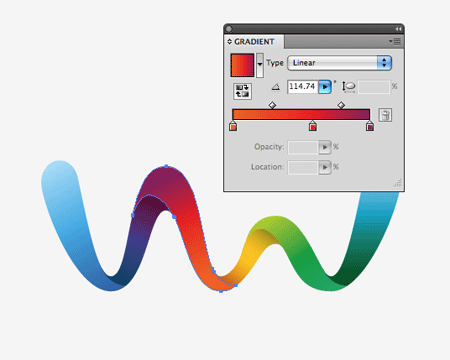
With the wave then being made up of individual shapes, Gradient colour fills could then be added. Blending any old colour samples just doesn’t work – the result is a muddy brown. Colours must be taken in their natural order in the spectrum (think rainbows or the colour wheel).
The range started with blue, which faded to purple, to red, to orange, to yellow, to green and back to blue.

To give the three dimensional impression extra black was added to the areas of the ribbon that spiralled over, giving the impression that a soft shadow was being cast. This last touch is what really helps the graphic stand out.
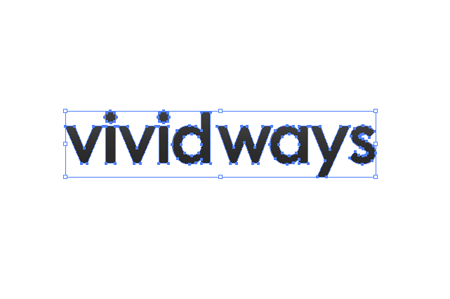
The chosen font was also laid out. This was edited slightly by reducing the tracking and carefully kerning the letters to give equal spacing on either side. The gap between the words was closed up slightly to pull the words into more of a combined mark.

The logo graphic and type were then combined, the flowing line of the graphic seemed to fit quite well into the natural shape of the text when sat in a vertical layout.
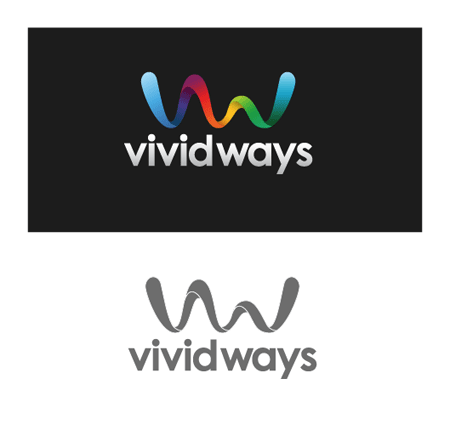
The final logo was then developed into a few secondary variations such as being reversed out of a dark background, and reproduced using a single colour for use in specific circumstances.
This rendered the project complete, the logo files were zipped up and sent over by email.
Overall a highly enjoyable project, it has been a pleasure working with Scott and Jon and I’m looking forward to seeing the development of the Vivid Ways blog.

That was great! I really like the end result.
Thank you for showing us the process.
damn love the concept and the result…keep up the good stuff
That is a really nice logo and I just love the gradient in the text.
I regularly check your portfolio as well as your blog and this logo really stood out when you added it! I was hoping you’d write a blog post about it and here it is! I love the way you work, and this logo has to be one of my favourites pieces of yours, thanks!!
Thanks for great tutorial. Nice day
Nice turnout!
Without reading any thing you have written, I would have to say that the logo communicates the name very well and the black n white version looks great too :) Bravo! Will read the article now :)
Wow. Impressive. I love how you made the gradient work. I think a lot of times, designers will ruin the logo with a gradient, but this one definitely needed it. Like Jaob said, the B&W works well so it’s great. Thanks for sharing!
I love posts that describe a design process. Great article and great logo!
WOW! Awesome!
Really good! Geat!
Hey Chris
Thanks for sharing this.
One question. You mentioned, “After conducting a little research, it occurred to me that the ribbon is a widely recognised symbol of life,…”
Could you elaborate more on your approach to this research?
Hey Jay, a simple Google Image Search for Ribbon of Life was part of the research. Not the most exhaustive method, but it generated some cool ideas! :-)
Wow! Outstanding work!
Always cool to see the process. Thanks for sharing this — nice work!
Guys, it works in my eyes, its energy/vibrant colours represents the end goal very well.
very nice… vibrant / fresh / energetic / smooth etc etc etc
Great work…
Hey Chris! Very nice post! It’s cool to see your sketches, process and also read the comments here :)
It was a real pleasure working with you on Vivid Ways, I’m really looking forward to the launch! :)
Thanks Jon, likewise – I really enjoyed working with yourself and Scott, certainly happy with the end result. Looking forward to checking out the site design and following the its growth.
Great, thanks for taking the time to walk us through the process it was great to see this amazing logo come from start to finish.
cheers
Very nice work, it’s always cool to see how great designers do this kind of work.
Far out those colors are beautiful. Absolutely stunning guys, great work.
Love the logo.
Awesome work.
Great post, thanks for sharing your process on this lovely and memorable logo. Interesting that I can see a very stylised version of the word “vivid” in the ribbon too :-)
I’m curious that you start with colour concepts for presentation — the few times I’ve done logo work, I always present the B&W version first, to lock down the concept, shape, balance, font, etc. Could you explain why you work in colour straight away?
Most of the time I also work in black and white first, however with this particular logo being largely focused on colour I did it the other way around – Making the primary logo in full colour, and secondary logo a variation that then worked in mono/black.
For me it depends on the circumstances.
lovely logo, and very interesting post
Love the logo and the colors, but two little things:
1) if the client ever wanted buisness cards how well wold that gradient print? (or how expensive would it be)
2) One thing I remember from school in my identity design classes was to make logos proportional. I measured the height of your type and compared it to the length of the logo and the height of the symbol. Not really sure why but things just tend to register in our brains better when things are exact proportional heights in relation to each other.
see the image:
http://farm4.static.flickr.com/3642/3398531370_8bdbd06b82.jpg
http://www.artlebedev.com/everything/metrogiprotrans/brand/sign/m.gif
Thanks Niki,
RE: Printing, nowadays printers have no trouble reproducing gradients, imagine the range of colours that make up a photograph. The gradients in the logo are made up of the standard CMYK mix and the total coverage in well under limit so I’d expect it to reproduce well.
There’s also a flat colour version which would be more suited to printing the logo at small sizes, which uses a solid areas of colour rather than the blend between them.
There’s some good pointers there about the proportions, this one was simply aligned by eye taking into consideration the flow of the graphic above the letters. Scaling it up to the exact three x-height line would look well, and would definitely give more prominence to the graphic.
Great looking logo Chris and a nice breakdown of the process.
I really liked the all-blue ‘wave’ too, but everyone’s happy so that’s all that matters :)
This is great stuff, Chris.
great post and great insights, your blog is one of the most inspirational I follow..terrific job!
cheers
Nice one Chris. This logo is really impressive.
I think it’s a great example of a designer taking the time to listen to a client’s suggestions and generating a better product as a result.
Top notch!
Nice job Chris, Scott and Jon. Not only did you explain every step in a lot of detail, but the concept of the gradient in the text is awesome. I’m looking forward to seeing the launch of Vivid Ways!
As I’ve stated before, awesome logo design ^___^!
Beautiful logo, Chris. I enjoyed reading through the design process and look forward to the launch of Vivid Ways.
Great to see this walk-thru. Bravo!
What a concept! Awesome!!
Great job Chris — looks great.
great logo and process description :)
nice walkthrough!
Great Job!! Find some work at PhotoShopWork.com
http://www.photoshopwork.com
nice one!
Phenomenal logo! I was wondering about color as Niki talked about earlier. Would you specify pantones for all those gradient colors if they were to re-produce the multi-color spectrum version? I’m noticing designers are starting to focus on using several colors in their logos and clients are just having their materials printed in the 4-color process as opposed to adding several pantone spots.
Really good.
The logo is so colorful, and the feedbacks are great! XD
wow cool !
Great job Chris. Really love this concept and it’s colors.
Good job. Great logo and great post. It’s nice to see the design process and the previous logo concepts. Very impressive.
Your logo is absolutely beautiful. Excellent job! Your blog is so inspirational.
Great work Chris. It must bring immense satisfaction to come up with such a complete design that seems to fit the concept in every way.
I’d be interested to know, from all of your logo work in the past, how do you rate it?
Amazing…great work! keep em coming ,wish you the best
Great looking design Chris! I always get a kick out of seeing a follow designers process. My gradients often look washed out can you offer any tips or tricks…I promise I won’t tell:)
Chris, I love your logo/mascot walkthroughs! More so because the stuff you come up with is splendid and it’s a pleasure watching it come to life!
very cool, your walk troughs are always insightful
Hi Chris! You are my favorite blog to visit right now! FANTASTIC design as always. Can you let the folks know at Vivid that the link to the RSS feed is not working – at least it did not for me. Just goes to a copy of the page..
I really like the design of this logo!
wow, it’s awesome.. great job…
Really cool use of gradients. Subtle and not over the top. I love articles like this. It opens ones eyes to the fact that logo design is a process that doesn’t take 5 minutes. Its a gradual and unique process.
Nice job, Thanks for showing how you did it in illustrator.
Chris, just ran thru my rss reader and read this post. The logo grabbed my eye immediately….what a wonderful mark. Love it. Executed so well also
Wow, impressive work. The gradients are sick!
great design, thank
Logo designing is most definitely a process. As they often say, it just starts with a sketch, and it does. There is an initial idea and everything merges from there. Revisions then come later and by the time its done, the logo is precisely what the customer is looking for. That’s the process in a nutshell. Great post.
I really appreciate the tutorial…now I’m waiting to design a logo with similar effects :)
An awesome logo, and a really fantastic tutorial.
Excellent post, and an ever greater logo. good work!
Wow awesome logo , thanks for posting this Chris really great job.
That is absolutely fantastic…this is something I’ve been needing to the process of for a long time and you’ve delivered. Once again, great entry! :)
very nice design, thanks for the tut..
That’s a fantastic logo. Really modern and unique!
I think the tutorial was okay nut bot awesome. You failed at explaining the most technical part of the design, this is where you assembled/cuted/joined the shapes of the wave.
I really like this logo
I’m trying to understand that last argument: Spoon’s logo fails because he didn’t explain exactly how he made it?
Are you kidding me?
Very well done. It’s always interesting to see a project overview from concept to completion.
i like it, nice
Really neat article,totally agree with chewdesign about this,I really like how this logo turned out,great job.
I am now officially jealous. Brilliant work mate.
Great Job!! Thanks.
Check out PhotoShopWork.com
http://www.photoshopwork.com
That is a great logo. Have you applied a very slight grey gradiant overlay onto the text? Looks superb, even on the black, the colours work really well.
cool..
i love this article…
thanks for share…
I love the organic feel and the gradient colors used!
Chris, I appreciate you taking the time to put this post together about your logo design process. I think there is a lot of demand out there for this type of thing. Thanks again and keep it up!
Thanks for showing us how you did it. This logo is awesome and I love the gradients.
My very first post here…
nice “eye catchy” Logo design, very trend lately… I like it ;)
be careful when you send to print, I spotted some “Banding” problems in your gradients…
I would like to see the CD Manual!!!! Certanly cool too!
wow.. this is really give me fresh inspiration
luv the way
Thank you very much. I was looking for a tutorial like this…
Thank you for your good work. I like it vey much. I think it will be helpful for me. Thanks again.
Great work, Chris. Love the tutorial too. Keep up the great work here
Nice tutorial.
I love the rainbow gradation..
GOOD JOB
very helpful.
dont you see a bit of similarity to this?
http://bobblemedia.co.uk/
oOooOoo I like!
Very good logo, especially when the client tells you you nailed it or captured it. Always good words to hear. Every once in a while I come across a logo I wish I had designed. Nice job.
How inspiring. Logo looks fabulous.
hi, very nice logo desing. thank you
Beautiful man, +bookmarked.
Hi, I really like your Vivid Ways logo. It is full of fun. I am sure it will appeal especially to younger adults.
wow!!1 its full of teh awesomE!
Looks great, thanks for posting.
Selamün Aleyküm,
Your lesson is very good. I like it. I want to drawing your sytle anad i will teach my students.
More grease to your elbow!
Selam ve Dua ile (:
Nice concept and great work!
Also nice to see somebody who cares about using a single colour for specific circumstances.
GREAT!
Nice logo design bro. Awesome!
Look fine!
Super nice. I always wanted to know to make bendy gradients like that. Thanks.
and even possible to reproduce in b/w. gratulation. pretty good work and perfectly done.
ssss
wow great job ..
Wonderful logo sharing, thank you
Hey looks real good man!
Nice work. Very professional approach as well.
Creating a logo is much more than just jumping
in illustrator and going to town on it. xD
wonderful logo sharing, thank you Chrish Spooner my fav. pages.
This was a great walk-through. Thanks! Very timely!
Fantastic …
really nice stuff.
Clean Logo. I love the final look!
Top notch work! Great to see your design process. The colours totally rock!
really nice work!!! ty for sharing :D
Really Superb…
Super nice logo!! Thanks for sharing ..
Great job…