This post was originally published in 2010
The tips and techniques explained may be outdated.
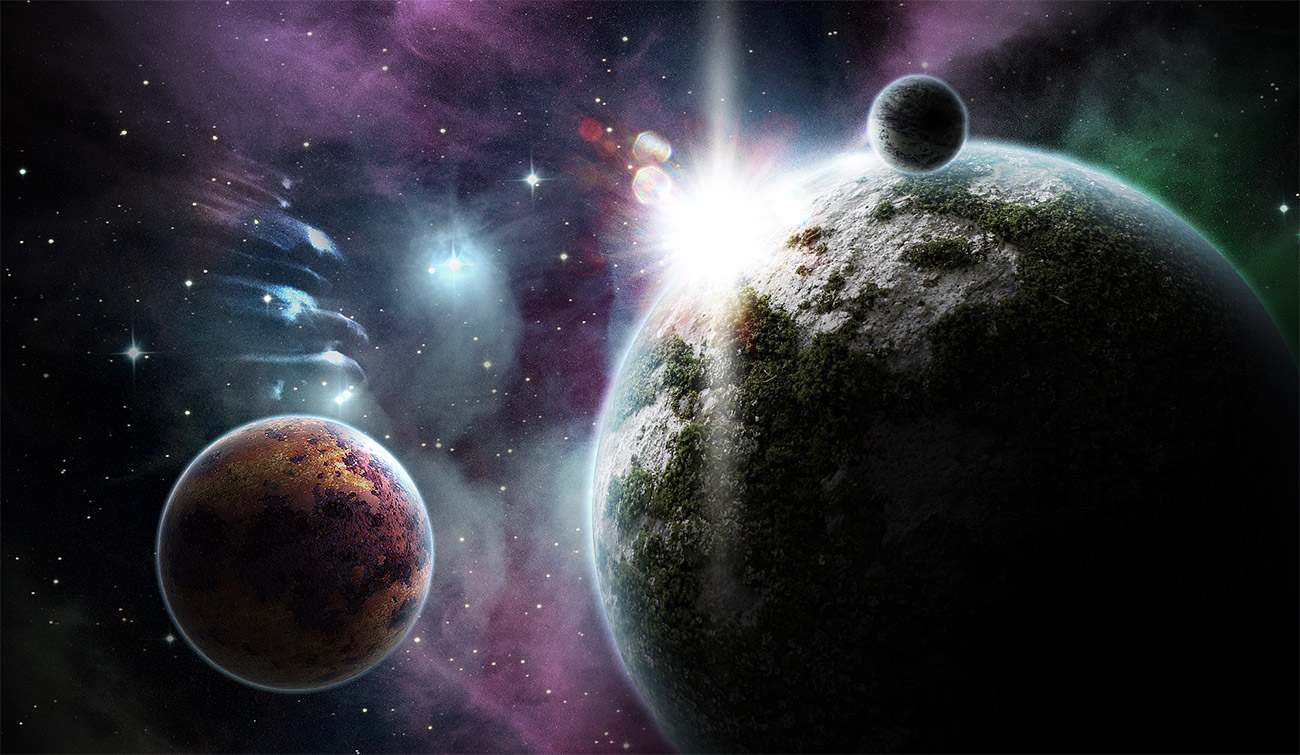
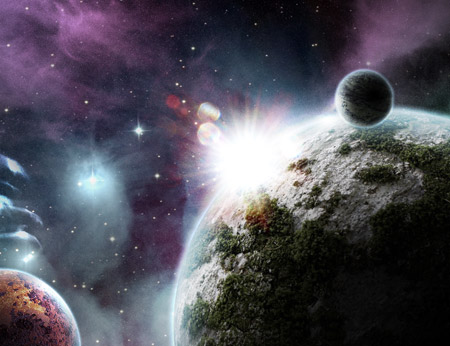
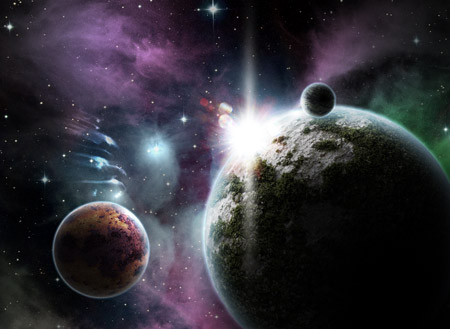
Ever since I saw the recent Star Trek movie I’ve been itching to create a gorgeous sci-fi inspired cosmic space scene. I eventually found the time to do so and created a piece of artwork named ‘First Light’. Follow this step by step walkthrough of its creation in Photoshop, from the making of the planets, to the vibrant nebula and bright lens flares.
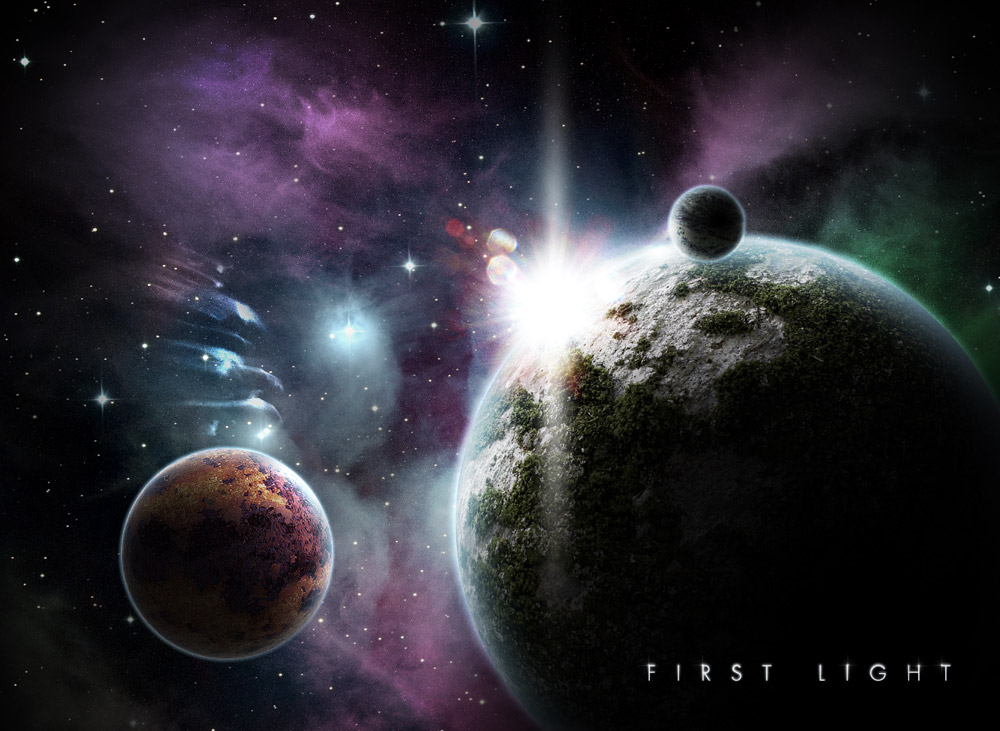
The design depicts the first light of morning in a distant solar system. The bright light from a nearby star illuminates the planet and its moons, while the surrounding nebula gives off vibrant pink, blue and green lights.
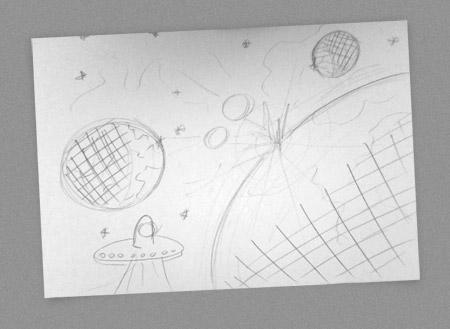
My design began as a sketch to quickly lay out a series of planets and moons to form a rough idea of the overall scene. Unfortunately the UFO never made it into the final version.
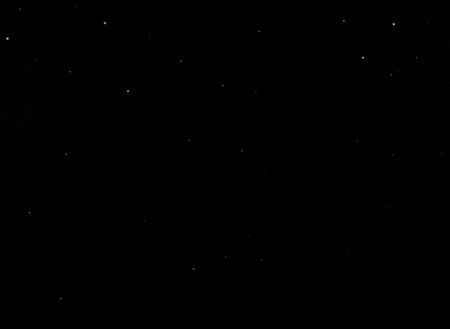
When you have your idea in place. Create a new document in Photoshop and fill it with black. Use a small soft brush to draw a few stars in the background. Change the brush size between 1 and 4 pixels.
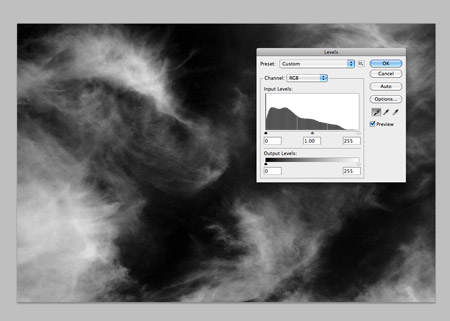
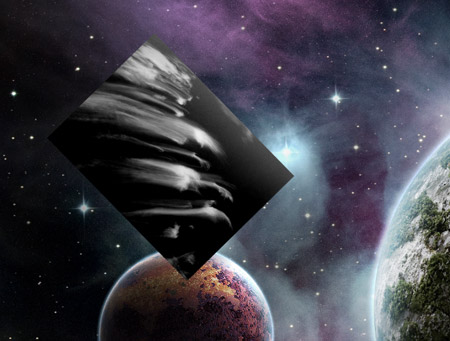
Find a stock photo of some thin and whispy clouds using the keywords cirrus or cirrostratus. This particular shot is from ThinkStock. Desaturate the image in Photoshop, then set the black point using the Levels window to render the whole sky black. Change the blending mode to Screen at 12%.
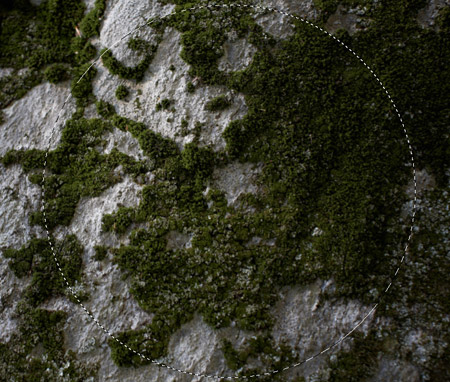
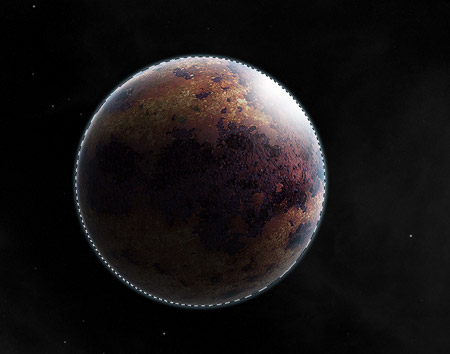
Find another stock photograph, this time you’ll need some kind of texture. A rock texture like this file from ThinkStock will make a great looking life-supporting planet with the moss representing the land mass. Draw a circular marquee over the whole area and copy into a new document.
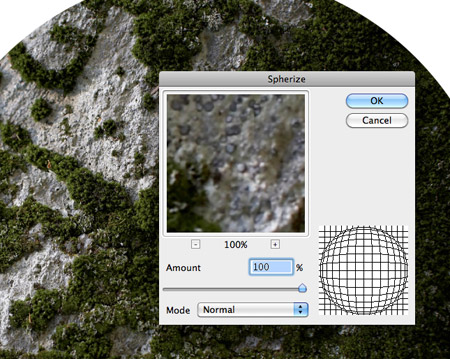
Go to Filter > Distort > Spherize and set the Amount to 100%. The distortion of the shape creates a three dimensional appearance to give the basic form of a planet.
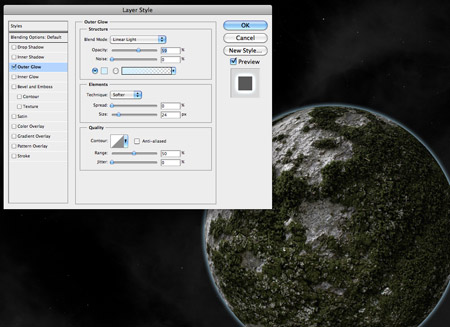
Paste the planet into the main document, then begin adding some layer styles. Start with an Outer Glow using a light blue, adjust the blending mode to Linear Light then change the glow amount and opacity to form a soft and thin atmospheric glow around the planet.

Next, add an Inner Glow. Use a slightly darker blue and give the glow a larger size so it softly spreads inwards.
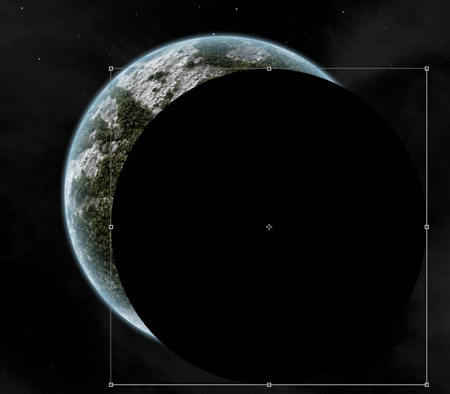
Hold CMD (CTRL for Windows) and click the thumbnail of the planet layer in the Layers window to load the selection. Fill this selection with black on a new layer, then move it to reveal a portion of the planet.
Add a large Gaussian Blur to transform the black circle into shading on one side of the planet. Scale up the shadow to alter the amount of light and shadow.

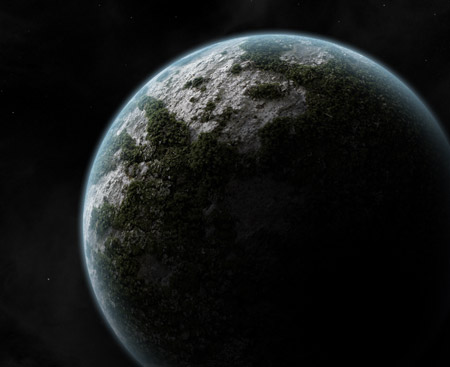
Dab a few spots of white over the lighter side of the planet using a soft brush. Change the layer’s blending mode to Overlay.
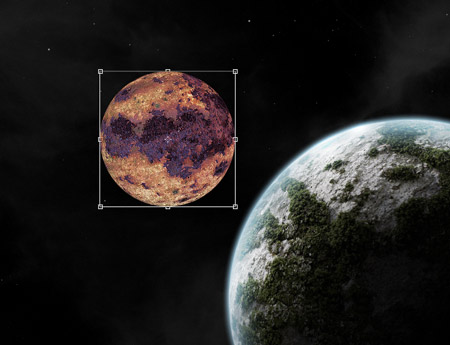
Use the same steps to form a nearby moon. Instead of a rock texture, this time search for a rust stock image.
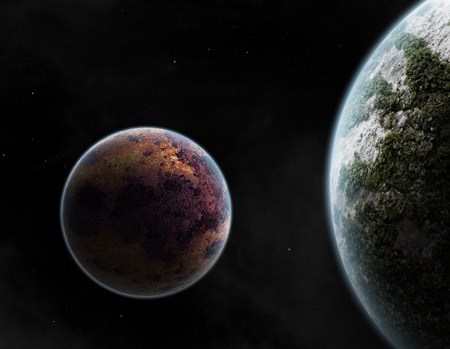
When creating the shadows and highlights, remember to keep the position of the light source in mind and position the shading appropriately.
Load a selection of the moon from the Layers palette and erase the highlights and shadows that extend beyond the edges of the moon.
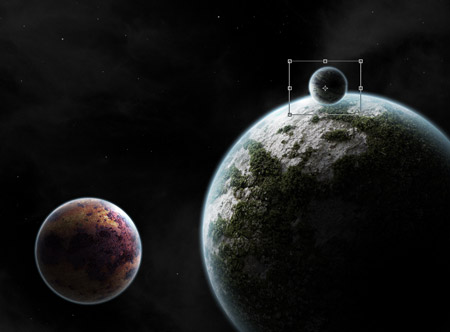
Continue adding moons and planets to lay out the scene. I’ve added another small moon orbiting the planet.

Let’s begin brightening up the scene with some awesome nebulas! Dab some pastel shades of pink and green across the document on a layer above the clouds, but below the planet and moons.
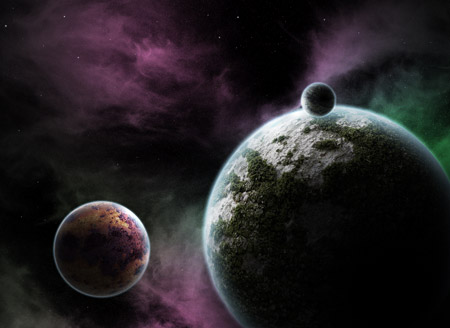
Change this layer’s blending mode to Color Dodge to allow the colours to interact with the cloud layer, creating a beautiful galactic atmosphere.
You can’t get any more realistic than a photograph, so find a stock image of a real nebula taken through a telescope. This shot from ThinkStock features cool blues and has a field of bright stars already present in the scene. Paste it into the document and change the blending mode to screen to allow this shot to also interact with out digital nebula.
Find a stock photograph of some more cirrus clouds. Give them the same treatment by desaturating the image and darkening the levels.

Change the blending mode of the clouds layer to Color Dodge and tone down the opacity to 80%. We now have a series of meteoroids.
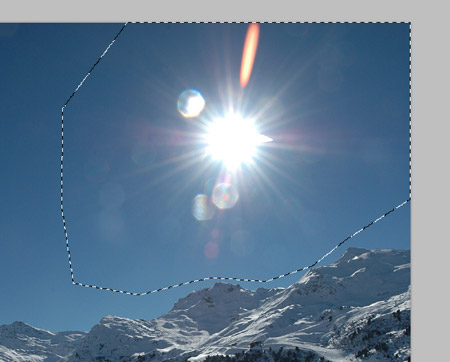
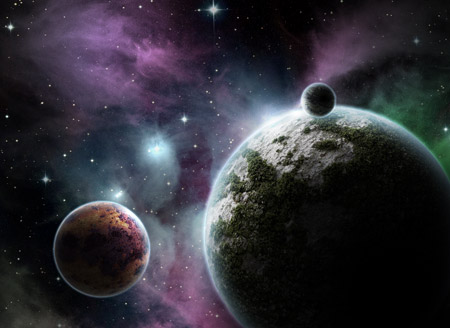
Hunt down another stock image, this time featuring a bright lens flare. Cut out the flare and paste it into the main document.
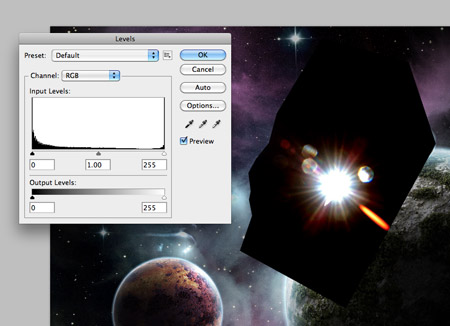
Darken the sky behind the flare to black, then change the blending mode to Screen to render the black area transparent.
Move the flare into position so it’s just creeping over the edge of the planet. Duplicate the layer to double the intensity of the light source.
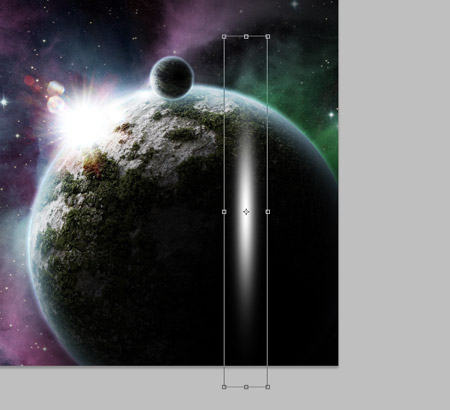
Dab one spot of white using a soft brush. Press CMD+T and stretch the shape vertically.
Position this long brush stroke over the light source to generate yet another subtle lens flare. Adjust the opacity to around 80%.
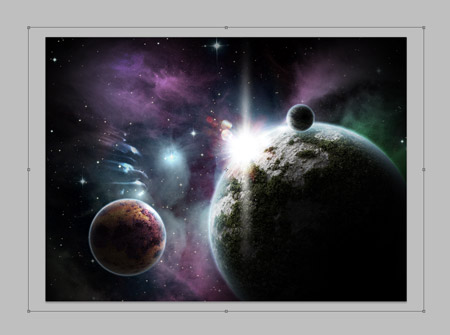
Add a new black layer over the whole design, then erase out the centre. Scale up the layer slightly to form a vignette. Change the blending mode to Overlay.
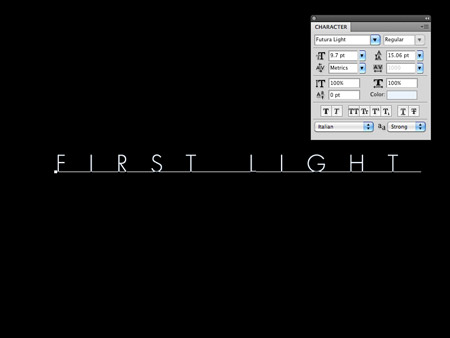
Finish off the design with a cool typographic title. Lay out the title of the piece in a cool font such as Futura Light with a super large 1000% tracking.
Add a Gradient Overlay using the layer styles palette, ranging from white to blue to black running vertically over the text.

Duplicate the layer and remove the layer styles, leaving just a plain white fill. Add a 2px Gaussian blur after rasterizing the text. Then add a layer mask and erase out the lower portion of the white text.
Add the text to the lower corner of the design to finish off our beautiful vibrant cosmic scene.

Nice, love it! where is the space ship which is on your sketch?
It must have warped to another galaxy!
Abducted by Humans :P
WOW! That is inspiring and outstanding tutorial. Thanks!
Excellent result! Planets look great!
Great idea and nice tut
I absolutely LOVE that scene you have created – very inspiring.
Really awesome. Really easy forward tutorial and the end result is great.
You are an amazing artist Chris !! It’s so cool that you can teach others too..
Superb, as per usual! :)
Looks great! The ‘Spherize’ tool in PS is so neat.
Wow. This is incredible.
I love this a lot! Thanks for sharing!
Really nice tut with simple tools and great result..ty a lot:)
Totally awesome.
Really interesting techniques in your tutorial. Thanks for sharing Chris!
Oh man! That’s sweet! Thanks for the ideas =)
Wow, these planets look super realistic. Never knew you could to this with PhotoShop… o_O
Great and inspirational tutorial. But, planets do not glow ;-)
They do in my galaxy! ;-)
Love your comment, rules are made just by human, why don’t brake them where it doesn’t hurt anyone :)
I love the way you made such a nice photo out of “nothing”.
Amazing work Chris, going to try this one out myself.
Great tutorial, I had a go, but it’s nowhere as near as good as yours!
just one word: AWESOME!!!
Perfect Work!
Wow, looks like an awesome tutorial!!! Can’t wait to give it a try.
Nice one.
Really nice! I love space sceneries :). Making the atmosphere of the smaller planet red or yellow and adjusting the glow properly would make it absolutely perfect! Thx for the tut!!!
Beautiful work. However vegetation does not come up that high.
Brilliant tutorial!! Quite happy how mine turned out!!
http://bit.ly/cTawOP
Fantastic as always
Making of planets is new way here , wonderful !! – thanks for the tutorial
daaaaaaaaaaaaang
Your tutorials have taught me so many clever techniques!
my god — you’re a genius!
this technique is very powerful when used with 3D renderings.
thanks!
Excellent with the moss texture for land. At a first glance I thought this would be a super long and hard tutorial but you used some really smart techniques.
You’ve made me want to work with design instead of physics!
Great tutorial, thanks! Further great effects can be achieved, I have found, by messing around with certain layers’ blending modes.
Here’s my attempt: http://h.imagehost.org/0599/space1.png
Truly amazing, your tutorials always are the best
thanks :D <3
@Design Turd:
“My design began as a sketch to quickly lay out a series of planets and moons to form a rough idea of the overall scene. Unfortunately the UFO never made it into the final version.” Ok?
But what a nice tutorial! I was wondering how you achieved that great-looking cirrus-style “thing”, and is actually a cirrus cloud. Amazing tut.
Hey Chris! Just did this tut, I used a green marble texture from CG Textures.com and it turned out AWESOME as a moon! Thanks for the awesome tutorial.
It’s gorgeous but the texture of the big planet is a little too… bumpy? Mountains, forests, and ravines don’t cast such large shadows when viewed from that distance :). I suppose this could be some incredible planet where trees can grow larger than Olympus Mons (the largest mountain in the solar system, located on mars), but it’s the only distracting thing in this otherwise perfect tutorial :)
Hey guys, here is my version of it, I made it for the company I work for, which is named after the constellation of Sirius.
http://www.flickr.com/photos/45793185@N04/4788685387/
Good effort Jordan – both you and Chris have inspired me to give it a go myself!
Awesome Tut!!
太棒啦!谢谢分享!
Very inspiring tutorial! Love the way the stock images are used in order to create such a realistic spacescene. At the end you actually don’t see if there is any stock material used.
Creative!
thanks for the tutorial man it was amazing!!
Pretty awesome but you left out some parts in the tutorial. One picture went from the nebula coloring with small stars in the back, then the next photos showed them with flares.
thanks the article!
awesome!!!! Love the level of detail!!!
I love your tutorials! I’ve read many other space scene tutorials, but none like this..by far the top of the list! Thanks!
Gracias, Luis.
I am trying this tutorial and I am getting very different results, starting with the color dodge to make the nebulas. can you explain more about the levels part? that might be my problem. but my nebulas dont look anything like yours. I have the colors leaking out and diffusing everything and none of the contrast you have. Thank you for any tips you can provide
your are great, that is very cool
i love how you make it look so easy. great informative tutorial, the final picture is awesome!
Great tutorial! Thanks for sharing! :D
Awsome tutorial!
I did that (if you want to see!) : http://gylarven.deviantart.com/#/d2u3zc7
Awesome tutorial. Well explained and very inspiring. Thanks for share. :)
that’s one great tutorial ^_^ very straightforward. I’m going to try your other tutorials too..it’s my first read here at your blog
This is awesome! loving your work and hope to get to a level like yours one day! Thanks
This is a very nice tutorial. I like the different methods used to create this scene. Its amazing and not to time consuming at all. 5 starts. I was thinking i might do this and maybe and a space shuttle or satellite. Better yet s ship from star wars like the millennium falcon. Nice
where is them cool patterns going across the picture
Wow. Amazing! I used this to help me on my own take on this tutorial… It turned out ok.
http://radikar.deviantart.com/#/d2udmwa
^There’s the result.
You’ve explained things quite well… but I was slightly lost when you said “Scale up the layer slightly to form a vignette.” I wasn’t sure what you meant, so I just modified the picture with what I could.
Now this is very cool. Quality tutorial!
I remember this tutorial but from another guy, you have basically taken his stars and planets tutorial and merged to one with some added details, effectfulness deluxe :) So basically you just made it better ;)
Hi. Thanks for the great tutorial…
Amazing!!!!!!!!!!!!!!!!!!!!!!!!!Awsome!
Gr8 — You are here just exploring good techniques . Thanks for this posting .
Muito bom este conteúdo, parabens também trago dicas de design, da uma olhada la http://www.vitordesigner.com.br
Outstanding!!!!!!!!!!!Awesome post.
This is awesome dude!
Ben böyle bir film görmedim arkadaşlar süper ötesiydi.Hepinize tavsiye edeirm.
good work very atractiv
I loved following your tutorial Sir Chris..Thank you very much!
Simply great tutorial, simple but highly effective. Loved it. :)
Hey,
I am a graphic designer myself and I am sure to give shot at this one… Building up cosmic space.
Best,
Nick Jones
Great tuts!!!! tnx for sharing
This blog is getting better and better …
Congratulations Chris ;) this post is absolutely fantastic ;)
Thank you so much for sharing!!
its a MASTERPIECE!
Quite brilliant :)
just twitted it ;)
I did the tutorial and then added an eye stock, since I watched Clash of the Titans I had this idea of a giant god with an eye the size of a planet and being angered at space because of all the things that are in it.
Although my version doesn’t express the anger
it does show my idea.
Here is the link:
http://regression-ofpulse.deviantart.com/#/d2vgvi6
A bit late I know but hey ! hey !
Good tut. Have been looking for something like that – how díd you do the stars? Did you use the brush tool for it? Mine never look so good.
thanks.
Nice tut. How did you do the stars? Did you use the brush tool? Mine never end up looking this good.
thanks
thank for share.
very cool man. thanks for the inspiration and tips!
Awesome! i was thinking that you put real planet pictures …. time to play with spherize distortion :D
That was nice man!
good job.
Yusuf Güney Dinle.Yusuf Güney Dinle blogumuzd bu gün Durham hakkında orjinal bilgiler vereceğim.