Tutorials
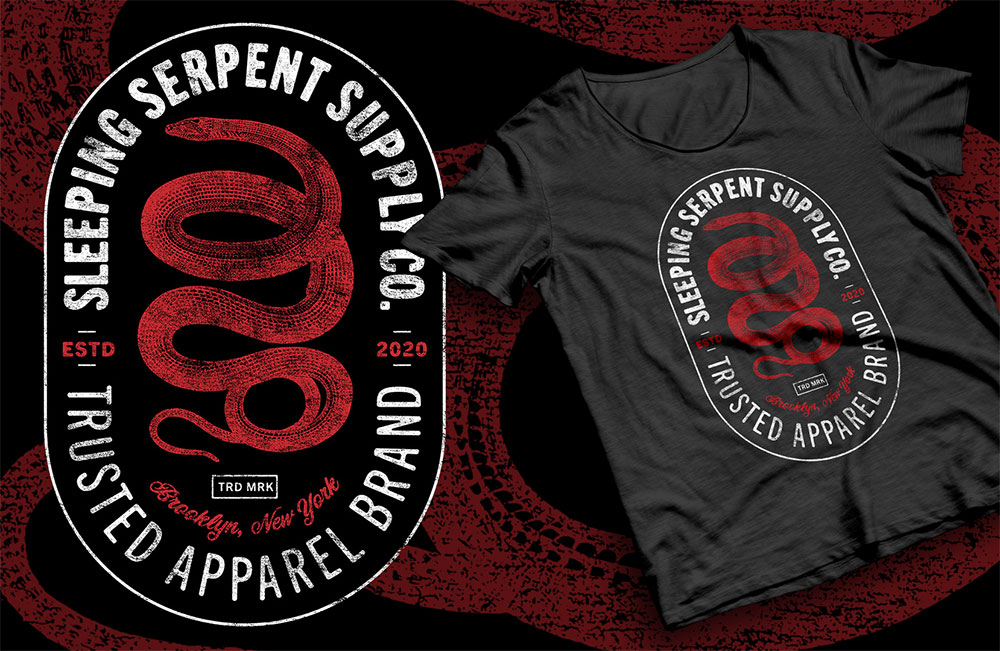
In today’s Photoshop tutorial I’ll show you how to easily create cool looking vintage logo designs by combining antique illustrations with some visually interesting text styles and layouts. This kind of artwork is really popular as T-shirt graphics, so I’ll show you how to set up your document at the appropriate size for a T-shirt design. To finish off the artwork, we’ll apply some vintage print effects and make use of my Washed and Worn textures to make the digital design look like a real old T-shirt print.
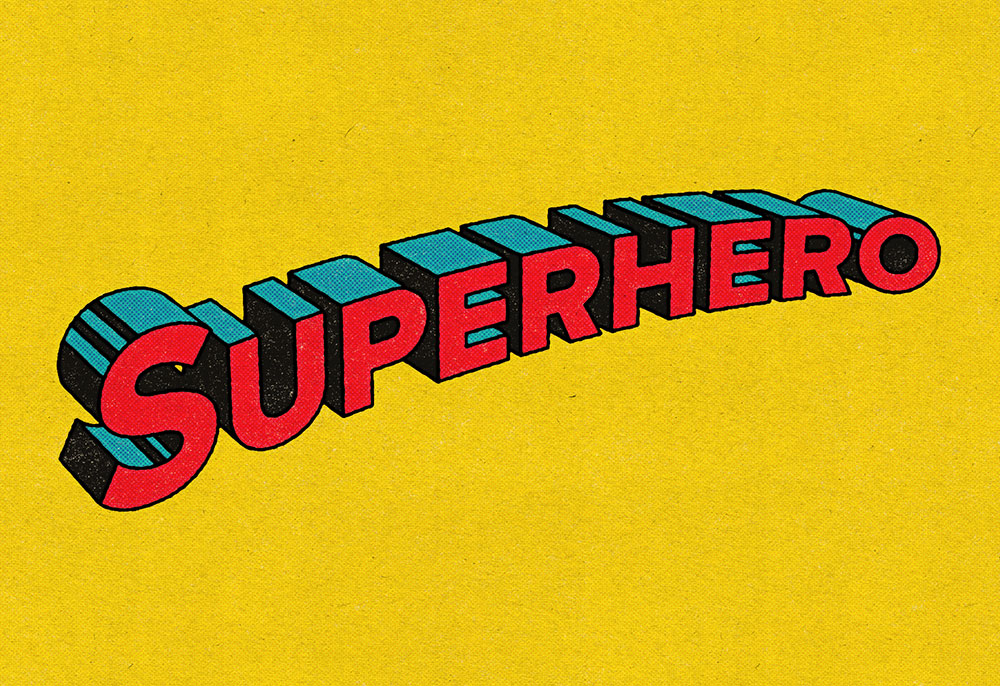
In today’s Adobe Illustrator tutorial I’m going to take you through the process of creating a retro text effect, inspired by the title art for the Superman comic books. Old comic book titles feature some really simple but effective text styles, often incorporating faux-3D effects, bright colours, and thick black outlines. It’s a graphic style that is immediately recognisable thanks to these common visual features that appear in different variations across all the superhero stories. The original comic book covers were drawn by hand, but I’ll show you how to apply some adjustments to your text in Illustrator to transform it into a bold comic book title effect, then stick around to the end to see how the comic book theme is enhanced with the help of my Bad Print Effects Photoshop Action.
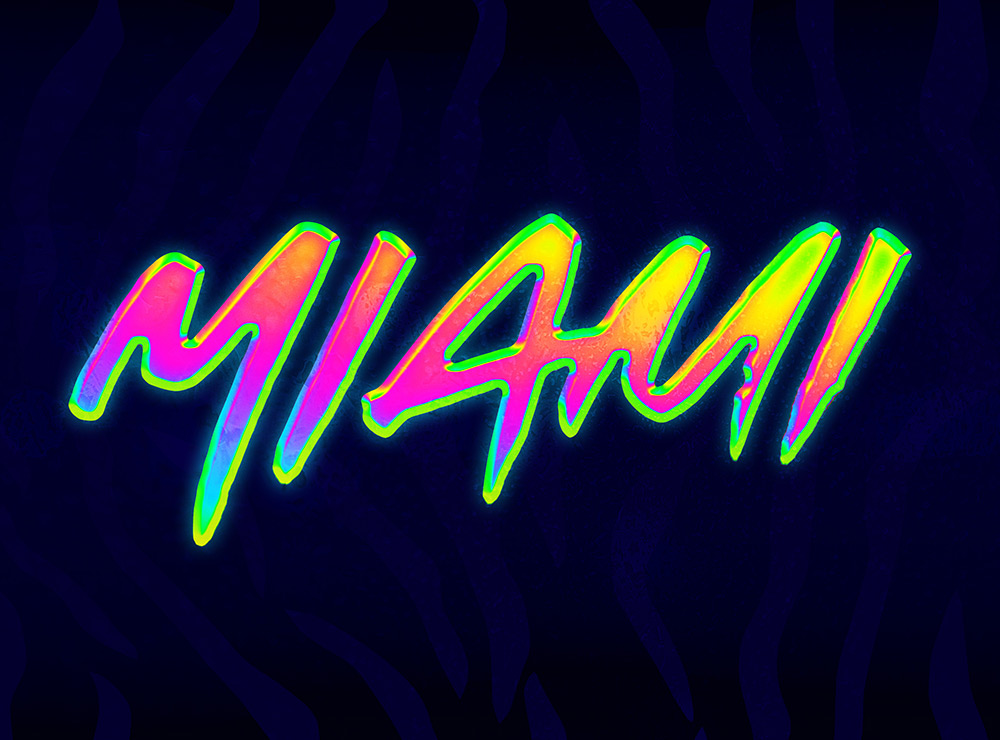
In today’s Photoshop tutorial I’m going to take you through the process of creating a vivid 80s style neon chrome text effect. This ultra rad style uses the most intense RGB colours available to create the brightest, most fluorescent effect possible that smoothly transitions through a variety of hues. We’ll use Photoshop layer styles to create the foundation of the effect, then add the vibrant colours with a combination of gradient tools. Some subtle texturing helps to add some intricate details to the chrome text surface, then the artwork is finished off with a complementary 80s inspired tiger stripe background.
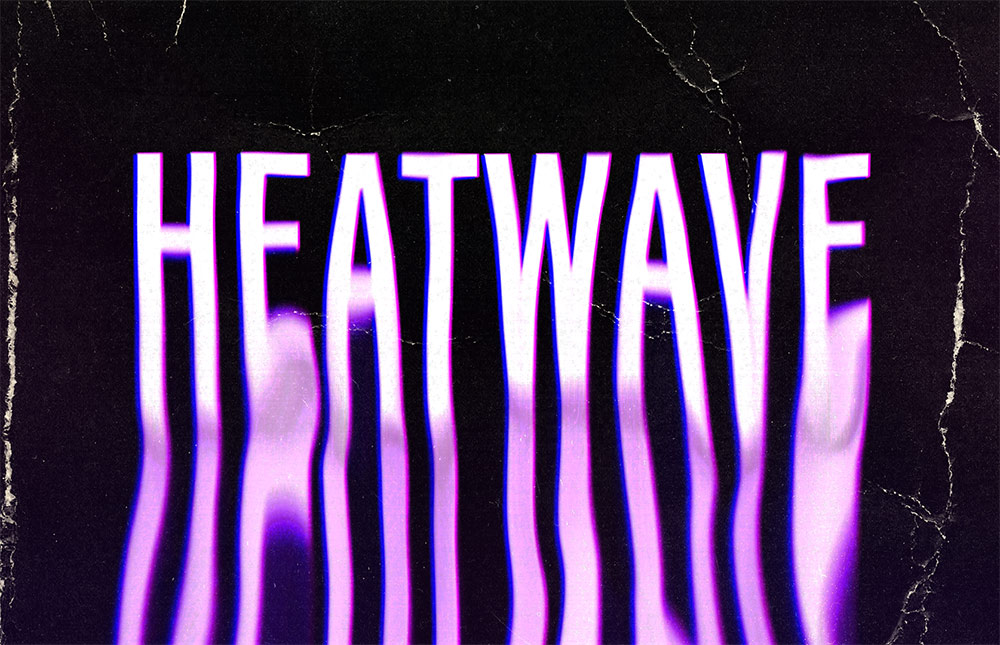
In today’s Photoshop tutorial I’m going to take you through the process of creating a melting liquid RGB text effect with somewhat of a retro 80s aesthetic with its vibrant colours and grainy texturing. This effect is ideal for creating poster art or an album cover design with a retro-futuristic style. We’ll use a couple of simple tools within Photoshop to create the effect, then finish off the piece with textures to enhance the retro vibe.
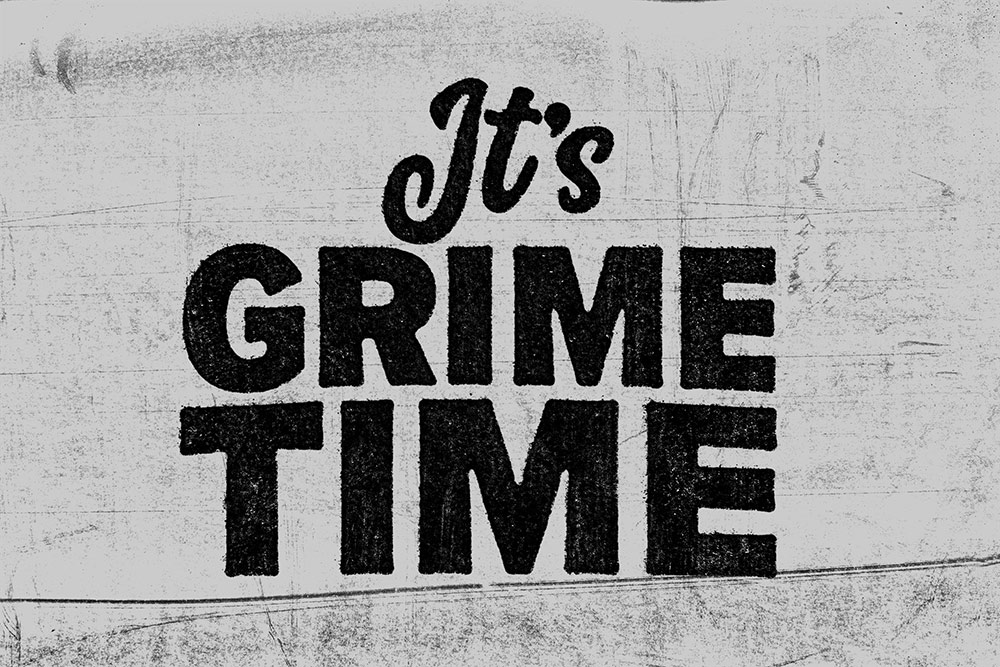
In today’s Photoshop tutorial I’m going to show you how to add grungy, distressed, ink stamped effects to your type, logos, or illustrations. The effect resembles the letterpress printing style, or any other impact print method, like a rubber stamp, or an old typewriter. I’ll show you how to distress your clean digital artwork to give it a fuzzy, irregular appearance as if the ink is bleeding to distort the outline of the artwork, causing some areas to blend together. I will provide you with my free Dirty Surface textures to simulate how parts of a stamped print don’t have enough ink coverage, giving it that lovely textured retro print look. Then we’ll use those same dirty surface textures to finish off the artwork with a complementary dirty background to completely transform the clean digital art into a cheap letterpress print with gritty details.
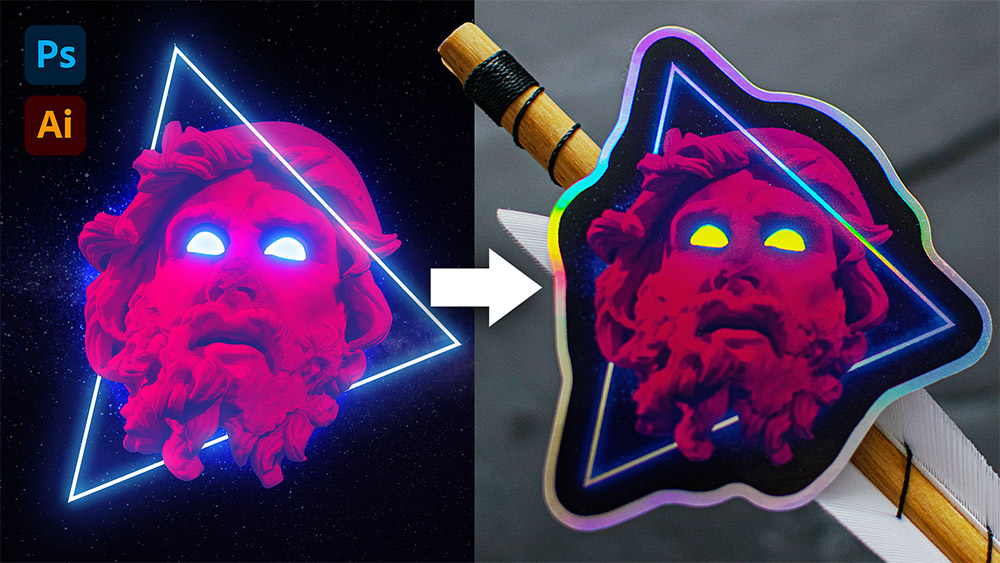
In today’s tutorial I’m going to take you through the process of designing a sticker using Photoshop & Illustrator, but more specifically, I’ll show you how to set up your print artwork file to create cool sticker effects with a colourful holographic finish. By cleverly setting up the print file to allow the holographic effect to show through in key areas of the image, you can create some totally awesome sticker designs!